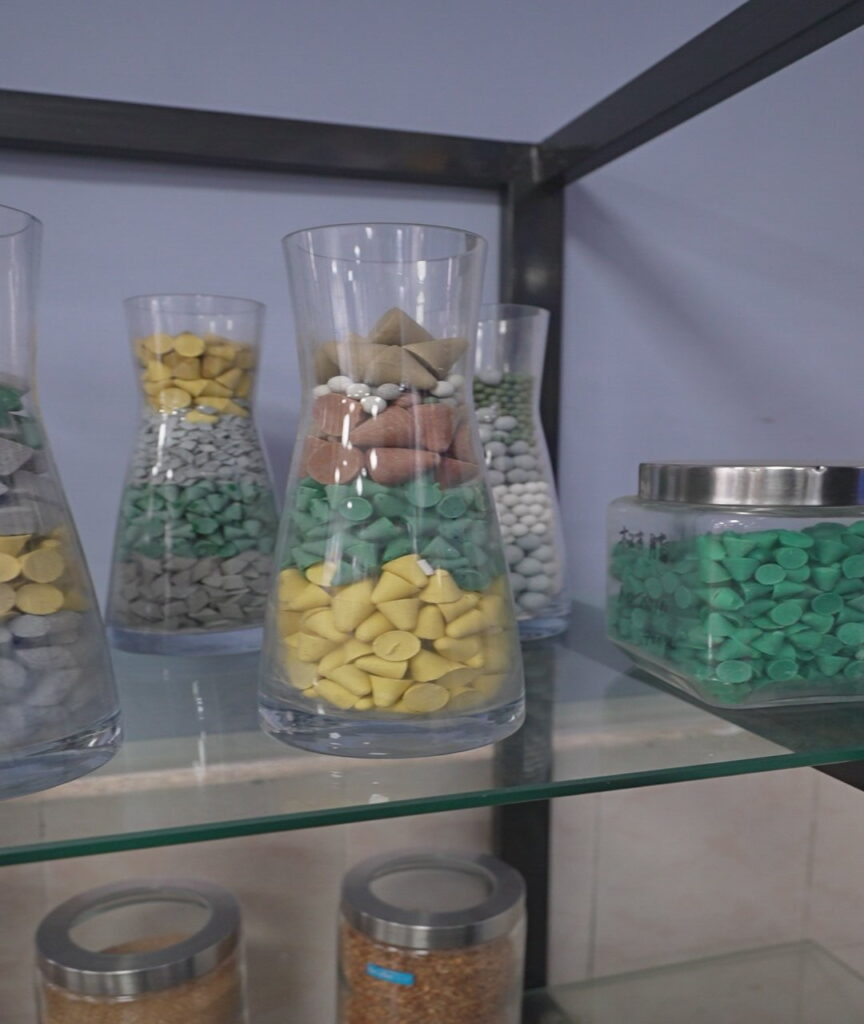
Tumbling Media: How to Choose Grade, Size and Shape for Your Parts
Tumbling media is selected by three things: cutting grade, size relative to the smallest feature on the part, and shape. Material name — ceramic, plastic, porcelain — is the last decision, not the first, because the same "ceramic media" name covers a rough-cutting triangle and a burnishing ball that behave nothing alike.
This page gives you the sizing rule, the six cutting grades we actually stock, and the specific part features where each choice fails. If you already know you need a sample trial, that is the right instinct — the numbers here are a starting point for a trial, not a substitute for one.
What you see on the shop floor when the media is wrong
Four symptoms cover most media mistakes, and each points at a different variable:
| What you see | What it usually means |
|---|---|
| Edges rounded over, dimensions drifting on a thin part | Media too coarse for the stock to be removed, or a grade run too long |
| Burrs still there after a long cycle | Media too fine, or the media is spent and no longer cutting |
| Part colour gone dull grey and won't brighten | Carried coarse grit into the polish stage, or compound not carrying swarf away |
| Media wedged in a hole, slot or thread | Media size wrong for the feature — a sizing problem, not a process problem |
The third one is the most misdiagnosed. A grey haze that appears late in the cycle is usually blamed on the compound, when in practice the charge still holds grit from the previous stage and is polishing over it.
Why media choice goes wrong: the material trap
The common failure is buying media by material name. Two charges both sold as "ceramic media" can differ by a factor in how fast they cut, because the name describes the body, not the abrasive grade.
What actually determines the result is how much stock the media removes per hour, and how much of the part geometry it preserves while doing it. Those two pull against each other: a faster cut is almost always a less shape-preserving cut. Every media decision is a point on that trade, and the trade is set by grade and shape — not by whether the body is ceramic, plastic or porcelain.
This is also why a cycle time quoted from someone else's job rarely transfers. A published cycle assumes a material and a removal that may not be yours.
Check this before you look at media at all
Work through these six items on the actual drawing before selecting anything. Skipping any one of them is what produces a disappointing first trial:
- Where the burr is, and how strongly it is attached. A loose burr at a drilled cross-hole and a heavy gate from casting are two different jobs. Extending a gentle cycle to remove a heavy burr rounds every good edge before the burr goes.
- The smallest feature on the part. Smallest hole, narrowest slot, tightest thread pitch, smallest internal radius. This number sets the maximum media size — see the rule below.
- The stock to be removed, in absolute terms. Not "deburr" but how many tenths of a millimetre. This sets the grade and the time.
- Which surfaces must not change. Cosmetic faces, sealing faces, thread flanks, bearing bores. Media does not know which face matters.
- Material and its condition. Soft alloys cut faster and smear; work-hardening alloys need a short, controlled cut; plastics behave nothing like metal and are usually a dry process.
- What happens downstream. Plating, anodising, assembly, inspection. A part polished to a slightly different base colour than the previous batch will fail a plating consistency check, and that is a process question rather than a machine question.
The sizing rule, and why it is a rule
Media should never be larger than about one third of the smallest feature on the part.
The practical consequence: a part with a 3 mm blind hole needs media smaller than 3 mm, which means a fine grade and a longer cycle, and there is no way around it. For a general edge break on a flat plate the media can be much larger and the cycle much shorter, because the job is only to knock the edges back.
A useful field check before running anything: put the part in a bag with a sample of the media. If the media will not enter the features by hand, it will not enter them in the machine either.
Media that is too fine for the part is equally wasteful in the other direction — it cuts slowly, and the part tumbles around without much being removed. The frequent failure on aluminium specifically is to use a media graded for stainless and then try to polish out the damage, which removes more material than the original process would have.
The six cutting grades we stock
Our media is graded on a six-point scale, and the same scale is printed on the wet-grinding and dry-grinding tables that go with each product:
| Grade | Meaning | Typical use |
|---|---|---|
| VR | Very Rough — maximum stock removal | Heavy burrs, casting flash, saw burrs |
| R | Rough — heavy cutting | Standard deburring on robust steel parts |
| N | Normal — standard processing | General deburring and edge breaking (wet) |
| M | Medium — general finishing | General finishing (dry) |
| NF | Normal Fine — intermediate quality | Intermediate finish before polishing (wet) |
| MF | Medium Fine — pre-polish | Pre-polish stage (dry) |
| F | Fine | Fine finishing |
| FF | Fine Finish | Final brightening stage |
Note that the wet and dry tables do not use the same grade names — the wet table runs VR / R / N / NF / F / FF and the dry table runs VR / R / M / MF / F / FF. Do not mix a grade letter from one table onto the other.
Sizes and shapes that actually exist in the range
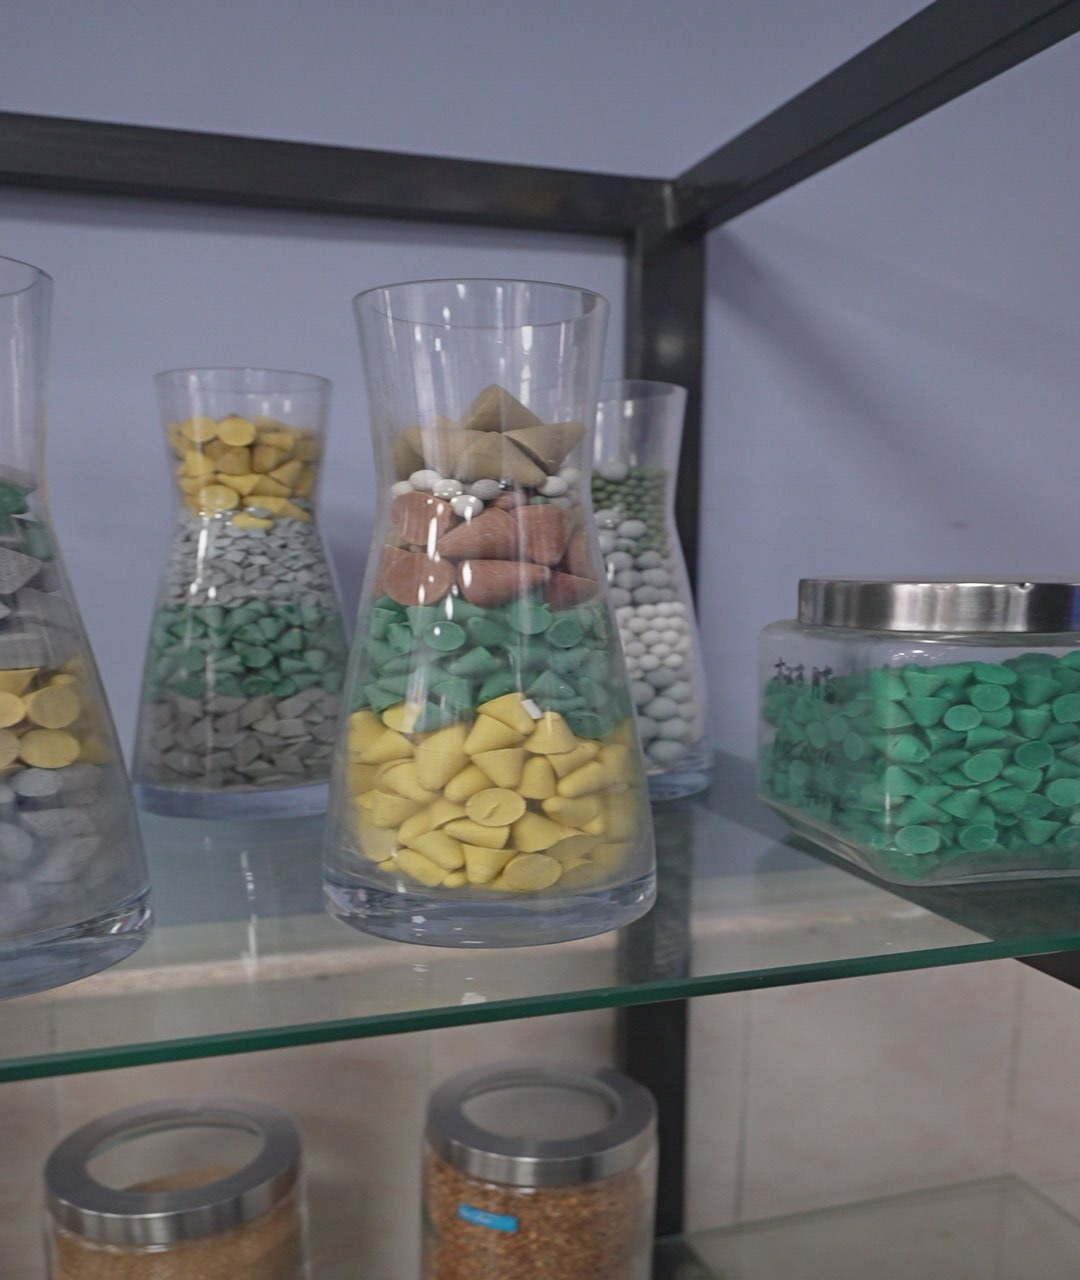
For wet grinding, brown fused alumina is stocked as angle-cut triangle, triangle, ball and angle-cut cylinder from 2 mm up to 30×30 mm depending on shape; ceramic as ball and angle-cut triangle from 2 mm to 20×20 mm; high-frequency porcelain as cylinder from 1.3×3 mm to 4×14 mm; and plastic as cone from 5×5 and 6×6 mm, with larger plastic sizes from 8×8 mm up to 50×50 mm on the finer grades.
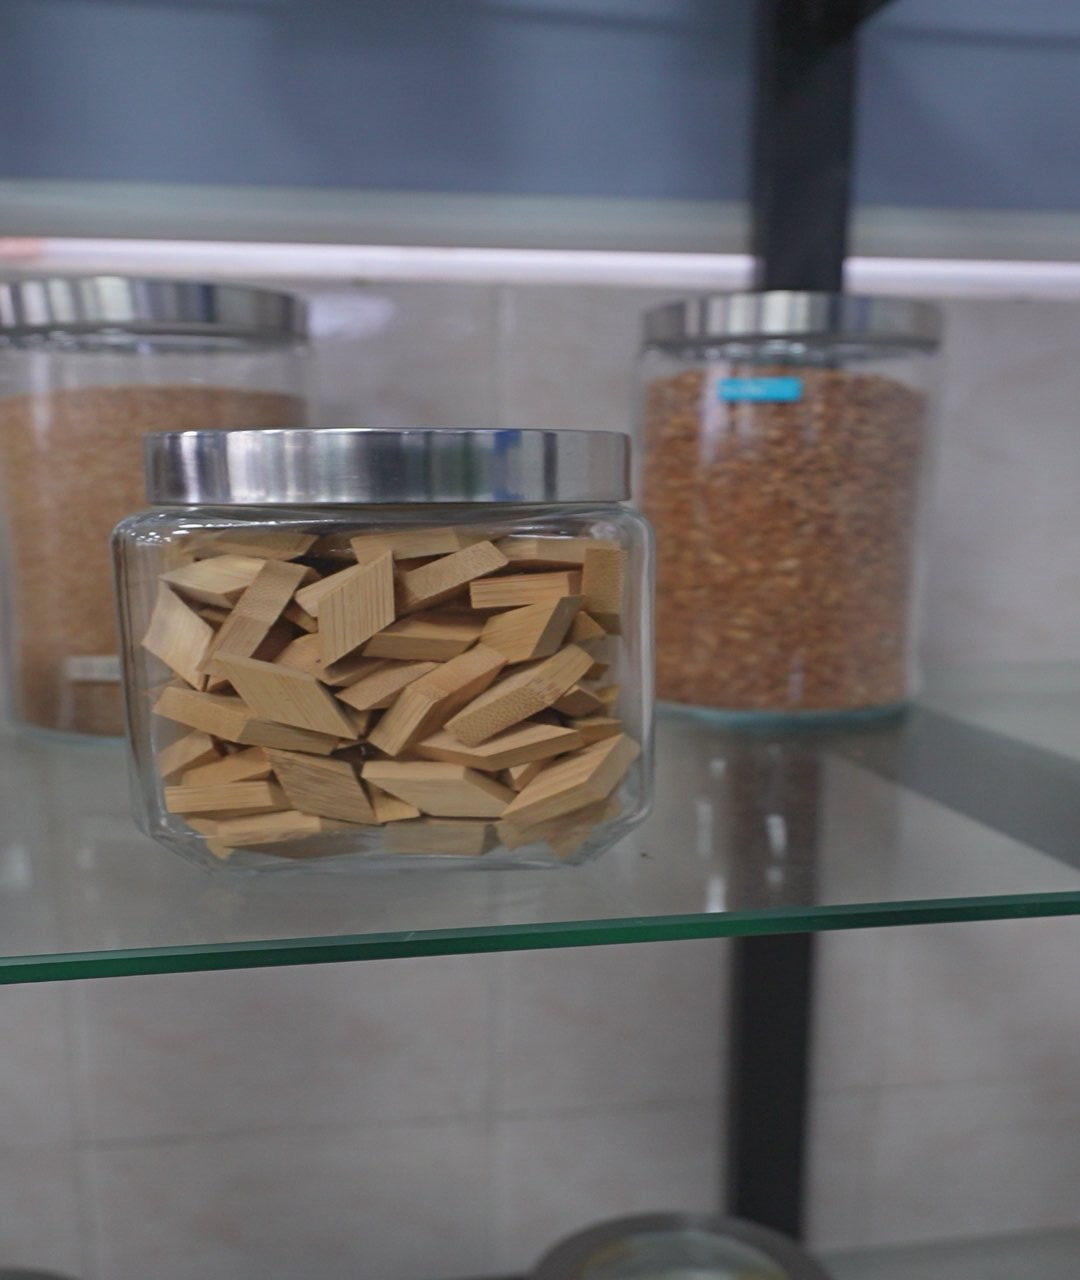
For dry grinding the range is walnut shell from 8# to 80#, wood in bullet / rhombus / square forms from 0.5×2 mm upward, bamboo rhombus 2×2 and 3×3 mm, and stone powder.
The two families are catalogued separately, because the choice between them is a wet-or-dry process decision before it is a media decision: ceramic, porcelain and plastic bonded abrasives are run wet in ceramic media, plastic media and grinding media, while walnut shell, wood, bamboo and stone powder are run dry and are catalogued under dry finishing media. Buying across that line by mistake is one of the more expensive ways to lose a batch.
Shape decides where the cut lands. A sharp angle cuts into a corner and a round bead burnishes a face; the same size in two shapes is not interchangeable on a part with mixed features. If your part has both an open face and a thread, no single shape serves both well and a staged process is usually cheaper than a compromise media.
Choosing tumbler media by material: stainless, brass and steel
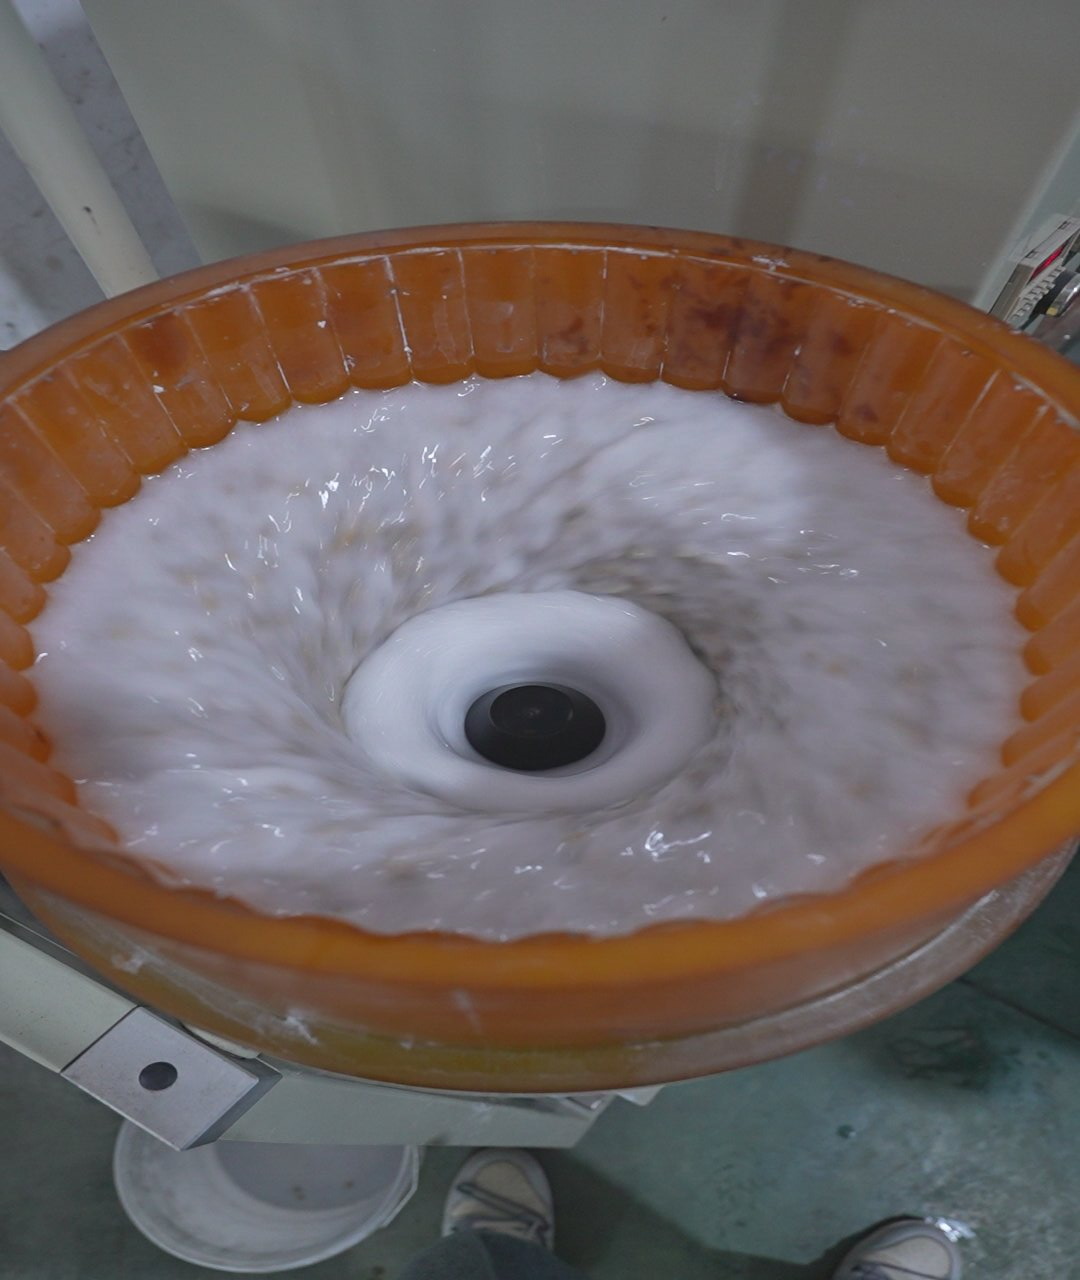
The grade-size-shape logic above is the general case, and it is what most buyers mean by “tumbler media”. There is a second axis that changes the answer for the same part geometry: what the part is made of. Three materials cover most of the enquiries, and each one rules out part of the range.
Brass: what “brass tumbling media” actually requires
Brass is the material where a media that "works" will quietly ruin the finish, because the problem is not cutting — it is colour.
- What brass needs: a media that cuts without embedding iron. A charge that has run steel carries steel particles, and a steel particle on brass produces a rust spot that appears after the part is already polished. The charge has to be dedicated, or cleaned between materials.
- What works: a fine ceramic or porcelain body at the finer grades, run wet with a compound that keeps the surface from tarnishing between stages. Brass discolours fast when it is wet and exposed, which is a compound question as much as a media one.
- What to avoid: a coarse charge run long. Brass cuts quickly, so the risk is not that the burr survives — it is that the edge and the detail go before you notice.
- The characteristic failure: a dull, slightly pink-grey cast over the whole part rather than a patchy finish. That is usually carry-over contamination, not a worn charge.
Stainless steel
Stainless is the opposite case: it is hard, it work-hardens, and it needs a charge that keeps cutting without polishing itself out.
- What stainless needs: a media that holds its shape long enough to work through the hardened layer, and a compound that keeps the swarf suspended so the fines do not re-polish the surface back dull.
- What works: ceramic at the medium-to-fine grades, run in two stages — a cutting stage to take the stock, then a clean change to a finer grade for the brightness. A single long run at a compromise grade is the usual cause of the grey haze that gets blamed on the compound.
- What to avoid: plastic media for stock removal on stainless. It is too soft to cut at the required rate, so it polishes the surface while leaving the defect.
- The characteristic failure: bright in patches, grey in others, with the grey areas corresponding to where the parts sat in the load.
Carbon and alloy steel
Steel is the material where the rust window decides the media choice as much as the finish does.
- What steel needs: a media that cuts efficiently (steel is forgiving on grade) and a process that gets the part dry and into the next stage quickly. A steel part that comes out well finished and rusts overnight was not finished by the wrong media — it was finished by the wrong sequence.
- What works: the whole range is available, because steel takes a coarse cut without distorting. The constraint is downstream: blind features hold water, so the separation and drying steps matter more than the media grade.
- What to avoid: leaving a wet charge on steel between shifts without a rinse discipline, and running steel before brass or aluminium in a shared charge.
- The characteristic failure: flash rust in blind features and on cut edges within hours, which reads as a compound problem and is usually a route problem.
The rule that covers all three
The rule for tumbling media and tumbler media alike: grade is set by the part, and the body is set by the material's contamination sensitivity. Brass and aluminium cannot share a charge that has run steel. Stainless needs a charge that keeps cutting. Steel needs a route that gets it dry. Same geometry, three different answers.
Where this breaks down — what not to do
Be specific about the limits, because they are where most trials fail:
- Thin walls. Below roughly 0.5 mm wall thickness the cut is not the risk; distortion is. A high-energy process will bend the part before it polishes it. Reduce energy or change machine family, don't just shorten the cycle. Where the wall is thin, the machine family matters more than the charge — a tub vibrator gives a longer, gentler path than a bowl, and a magnetic finishing machine removes the bulk impact altogether.
- Threads under a tight pitch tolerance. Media will lock into a fine thread. Either use a smooth small media, mask the thread, or accept that a thread-forming operation comes after finishing. If media is already lodging, the fix is usually a size and shape change rather than a longer rinse — see how to prevent media lodging in holes, slots and threads.
- Blind holes and deep pockets. Media enters and does not leave. Plan the separation and cleaning step before you buy the charge, not after.
- Soft plastics and acetate. A wet process holds the part in a warm bath and acetate will distort permanently. Most frame work is done dry for this reason.
- Parts where the base colour matters for plating. Polishing changes the surface colour slightly. If two batches have to plate to the same appearance, the finishing step must be held to a consistent base rather than to "as bright as possible".
- Work-hardening alloys such as titanium. The charge has to be dedicated and kept clean, because contamination carried in from another job shows as scratches.
What to ask before you approve the quotation
Media is cheap next to the consequences of getting it wrong, so treat the specification conversation as the important part:
- Ask for a sample trial on your worst-case part, not the average one. A batch that looks fine with simple geometry can drop to half the count once a feature traps media. We run trials this way as standard: you send representative parts, you get the finish back with the cycle time and the media consumption measured. The process for this is on the sample test page.
- Define acceptance before the trial. What counts as a passed edge, what roughness target, which faces are protected. A trial without a written acceptance standard only tells you what it looks like.
- Ask what the charge consumption is per batch. Media life runs from about 20 to 200 operating hours depending on material and cycle — a range that wide means the consumption has to be measured on your job, and it is the number that drives your consumable cost per part.
- Ask for the grade and size in writing on the order, not just "ceramic media". A grade such as "2 to 4 mm" covers a spread that matters on a fine feature.
- Confirm what ships with the machine. Standard packing includes the spare parts kit, a media and compound starter set, tools and manuals, so the first trial can run on arrival.
- Ask the lead time against your production plan. A standard machine ships in 25 to 35 days from the deposit; a built-to-order configuration takes 45 to 60 days, and adding a separator or a dryer extends it again.
Choosing by part, rather than by media name
The fastest route is usually to start from the part, not from the catalogue. Three starting points cover most enquiries:
- Metal parts with a burr to remove — start from the deburring grades and the grinding media range, then move to a finer grade for the finish.
- Plastic or painted parts where the surface must not be cut through — start from plastic media, which wears progressively and gives a gentler cut.
- Parts that need a dry process — eyewear frames, wood, jewellery and anything that would stain or distort in a wet bath — start from dry finishing media.
If the part is small enough that separation is the real bottleneck rather than the finish, the media choice is secondary to the machine and the screen; that problem is covered in how to separate small parts from tumbling media.
FAQ
Can one media type be used for every part? No. Geometry, incoming condition and target finish all change the contact requirement, and a charge that suits a flat steel bracket will damage a thin-walled aluminium housing.
Is ceramic media always better than plastic? No. Ceramic cuts faster and holds its shape, so it suits harder alloys and longer cycles. Plastic is gentler and cheaper, and it is the safer choice for soft alloys, thin walls and plastic parts. The usual band is 3 to 10 mm ceramic against 10 to 25 mm plastic.
How do I know when the media is spent? Three signals, all of which show up before the charge is completely dead: the finish stops improving, the part starts to show a matte grey haze, and the cycle time creeps up by around 20% for the same result. Top-up restores the cut, but a full change at a defined interval is usually more reproducible than blending new into old.
Can you supply media to our own specification? Yes, and it is normal where a part has a controlled material or a supplier audit has fixed the consumable. The specification has to be given as a grade, a size range, a shape and a cut-or-burnish behaviour rather than as a finished appearance — "make it look like this sample" cannot be ordered or inspected.
Does the media come with the machine? A starter set of media and compound ships in the same case as a standard machine, so the first trial can be run on arrival. Ongoing consumption is quoted separately against your cycle.
 +86-592-2381506


 IPv6 network supported