Types of Burrs: How Six Incoming Edge Conditions Decide Your Deburring Route
Every print reaching the finishing bay says "break all sharp edges and remove burrs," as if every unwanted ridge on metal were the same physical object. On the shop floor, a thin lateral fin beside an end mill, a hinged lip pushed out of a drilled bore, a torn casting ledge, and a bead of laser slag behave completely differently inside a bowl. Load all four into one recipe and one part exits clean while another leaves with burrs folded across a cross-hole.
Diagnosing the incoming edge comes before picking any bowl, stone, or timer. Where our guide to removing grinding and sanding marks covers flat-face tool tracks across broad surfaces, this page classifies edge defects — the six physical types of burrs and flash conditions arriving at the finishing bay. Once you know whether the burr root is thinner than the adjacent wall, see selecting a deburring machine route to match machine kinematics to your batch.
Why "Remove the Burrs" Is Not an Engineering Instruction
Prints routinely specify edge cleanliness in a single note without naming how the upstream cutter or die formed the ridge. That omission causes most failed trials, because loose media responds to root thickness rather than drawing notes.

Why machining burr classification starts at the burr root, not the burr height
Operators naturally judge a burr by how tall or jagged it looks under bench light. Tall, papery feathers look alarming in a bin, yet mild abrasive contact snaps them off quickly because their attachment base is narrow. In practical machining burr classification, the single dimension that governs removal effort is root thickness where the burr joins the parent edge, never burr height. A short, stubby ridge with a wide base resists loose media far longer than a tall ribbon.
The root-to-wall ratio: why thin walls fail before thick burr roots shear
Loose abrasive media does not aim strictly at the burr; it rubs every exposed surface and corner at once. Whenever a burr root is nearly as thick as the adjacent part wall, loose tumbling media will round off functional corners or bend the thin wall before cutting through the base. Comparing burr root thickness against the thinnest nearby flange, tab, or thread crest tells you immediately whether batch tumbling is safe.
Clean shearing versus peening and folding over a cross-hole
Two actions compete every time a stone strikes a raised lip: abrasive grit shaves metal away, while stone weight pushes the lip sideways. If media impact is too heavy for a ductile burr root, stones fold and cold-work the burr flat across an adjacent bore or sealing face instead of shearing it off. Once a hinged lip is hammered into a counterbore or groove, gauges jam and manual scraping slows production.
How small parts surface finishing amplifies edge-to-mass mistakes
In small parts surface finishing, low workpiece weight changes contact mechanics inside a bowl. Heavy castings press firmly against the media bed, whereas tiny connectors, pins, and thin brackets float with the rolling mass. Because lightweight parts carry minimal inertia against passing stones, overly coarse media bounces small parts around or peens delicate edges rather than slicing heavy roots cleanly.
The Three Machining Burrs: Rollover, Poisson, and Breakout
Cutters removing chips on lathes, mills, and drills leave three distinct edge signatures depending on whether the tool enters, rubs alongside, or exits the cut. Separating these mechanisms explains why identical alloy batches deburr unevenly.

Machining rollover burr: the folded exit lip pushed ahead of the cutter
A rollover burr forms as a drill point or milling flute exits a wall and the remaining metal web becomes thinner than the chip load. Instead of shearing into a chip, that web bends forward on a hinge along the exit edge. Because a machining rollover burr has a thick, cold-worked hinge at its base, loose media must abrade through that hinge steadily without hammering the flap back into the bore.
Poisson side-extrusion burr: the thin lateral fin squeezed out under cutting pressure
As a cutter compresses metal forward, contact pressure squeezes a narrow ribbon of ductile metal sideways toward the free edge, much like pressing clay pushes up side ridges. These Poisson side-extrusion burrs run along milled shoulders, turned grooves, and keyway walls. Poisson burrs usually have a thin root relative to the part wall, making them the most predictable machining burrs to shear cleanly in vibratory finishing.
Rollover burr vs breakout burr: hinged ductile curl versus fractured exit ledge
Comparing rollover burr vs breakout burr formation comes down to alloy ductility as the cutter exits. Ductile stainless steel, low-carbon steel, and wrought aluminum bend outward into a rollover curl, whereas brittle cast iron, die-cast zinc, or hard brass cracks ahead of the tool nose. Instead of leaving a raised curl, a breakout or tear burr leaves a ragged negative chamfer that needs edge blending rather than root cutting.
Why all three types of burrs often coexist on a single milled pocket
A single machined manifold rarely carries just one edge defect. Where an end mill enters a slot it squeezes up a fine Poisson fin; along a cast boss exit it tears a breakout ledge; and where a cross-drill breaks into a main bore it pushes out a thick rollover cap. Always set your deburring route against the thickest, hardest-to-reach burr on the part rather than the easy external feathers.
| Edge Condition | Root Geometry | Upstream Source | Loose-Media Behavior | Pre-Trim First? |
|---|---|---|---|---|
| Rollover Burr | Thick hinged curl | Drill or mill exit | Folds if impact beats cut | Often, on thick exits |
| Poisson Fin | Thin lateral ribbon | Cutter side pressure | Shears cleanly and fast | No — direct tumble |
| Breakout Burr | Torn negative ledge | Brittle exit fracture | Blends ragged steps well | No — direct blend |
| Stamping Burr | Sharp tensile ridge | Die clearance shear | Cuts fast until dies wear | Only on worn-die flash |
| Cutoff Pip / Flash | Solid stub or seam | Lathe part-off; mold | Rounds corners before stub | Yes — trim stub first |
| Thermal Dross | Hard oxide beads | Laser or plasma cut | Resists soft plastic media | Yes on heavy slag |
Stamping Burrs, Cutoff Pips, and Thermal Dross
Sheet-metal presses, automatic bar lathes, die-casting cells, and laser tables create three additional edge conditions with very different metallurgy and root thickness.

Stamping die-roll and exit burr: why clearance wear turns a feather into a thick ridge
Every punched blank has a smooth, rounded die-roll entry side and an opposite exit side carrying a tensile tear burr. When punch and die edges are sharp and clearance is tight, that exit ridge is a thin feather that tumbles off rapidly. As stamping dies wear across press runs, widened clearance stretches metal further before tearing, turning a light feather into a thick, work-hardened ridge.
Why stamping burr removal fails when flat parts nest or thin tabs bend
In stamping burr removal, flat geometry causes trouble as often as burr thickness. Thin washers, shims, and contact blades cling together under wet surface tension like wet playing cards, shielding trapped edges from stones for the whole run. Reliable stamping deburring pairs angular anti-nesting media with thin-sheet compounds such as JTS5 so flat faces separate without bending delicate tabs.
Cutoff pips and casting flash: localized stubs that outlast flat faces
Bar-fed lathes often drop parts before the parting insert reaches center, leaving a solid cylindrical cutoff pip on one end face, while worn casting dies leave thick parting-line flash. A solid lathe cutoff pip or heavy casting gate stub is bulk parent metal rather than a thin burr, so tumbling long enough to grind it flat over-rounds every other corner.
Thermal and laser dross: resolidified oxide beads versus true cut metal
Laser and plasma cutting melt kerf metal and blow it downward with gas; when speed or gas pressure drifts, droplets freeze along the bottom edge as dross. Unlike a machined burr of parent alloy, thermal dross mixes resolidified metal with hard oxides. Because fused thermal dross is often harder than the base sheet, soft plastic cones skate over it, requiring fast-cutting ceramic media or upstream slag grinding.
Reading the Root Before You Pick a Tumble Recipe
Before loading an unfamiliar batch into any bowl, run four quick bench checks at incoming inspection. Five minutes with a loupe and a brass pick prevents spoiled lots and jammed screens.

Fingernail, loupe, and brass-pick bend test at receiving inspection
Draw a wooden stick or soft brass pick lightly across the edge under magnification. If the ridge flakes or bends easily at a hairline base, it is a thin Poisson fin or sharp-die feather ready for direct batch finishing. If the ridge feels rigid like a cast rib and shows a wide fillet at its base, treat it as a heavy root requiring upstream tool review.
Spotting hinged rollover burrs hiding inside intersecting bores and threads
External corners are easy to inspect, whereas internal cross-hole intersections hide the costliest defects in valve bodies and manifolds. Shine a bore light down the passage to check whether the cross-drill pushed a crescent rollover cap inward. Loose stones cannot flow forcefully around blind internal corners, so a thick internal cross-hole burr stays untouched or folds inward unless pre-cleared by a brush or cutter.
Checking one-third feature clearance before loose media touches a slot
Whenever burrs sit inside an open slot, keyway, or pocket, verify stone dimensions against feature width first. To circulate freely and shear slot edges without wedging or bridging, the smallest media dimension must stay strictly smaller than one-third of the slot width — never merely smaller than the slot itself. Stones sized just below the slot width jam side by side and force manual picking.
Recognizing work-hardened stainless or gummy aluminum burr roots early
Base alloy behavior changes how a burr root responds once tumbling starts. Austenitic stainless steels work-harden rapidly if rubbed gently by glazed media, turning an exit lip into a tough wire edge, while soft aluminum smears without brisk water and soap flow. Matching abrasive bite to the alloy slices stainless burrs off before work-hardening and shears soft non-ferrous fins without smearing.
Mapping the Six Edge Conditions to Loose-Media Equipment
Once bench inspection confirms that the burr root is thin enough for loose-media shearing, machine kinematics and media body determine cycle speed, edge radius uniformity, and surface protection.
Vibratory bowls and tubs for Poisson fins and moderate breakout edges
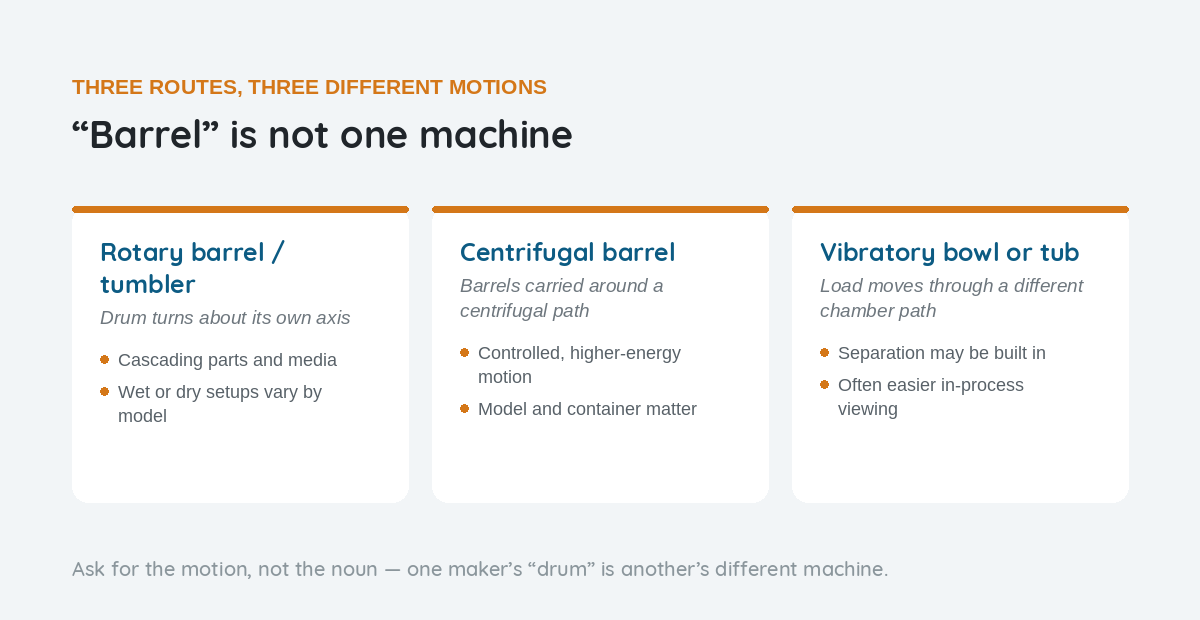
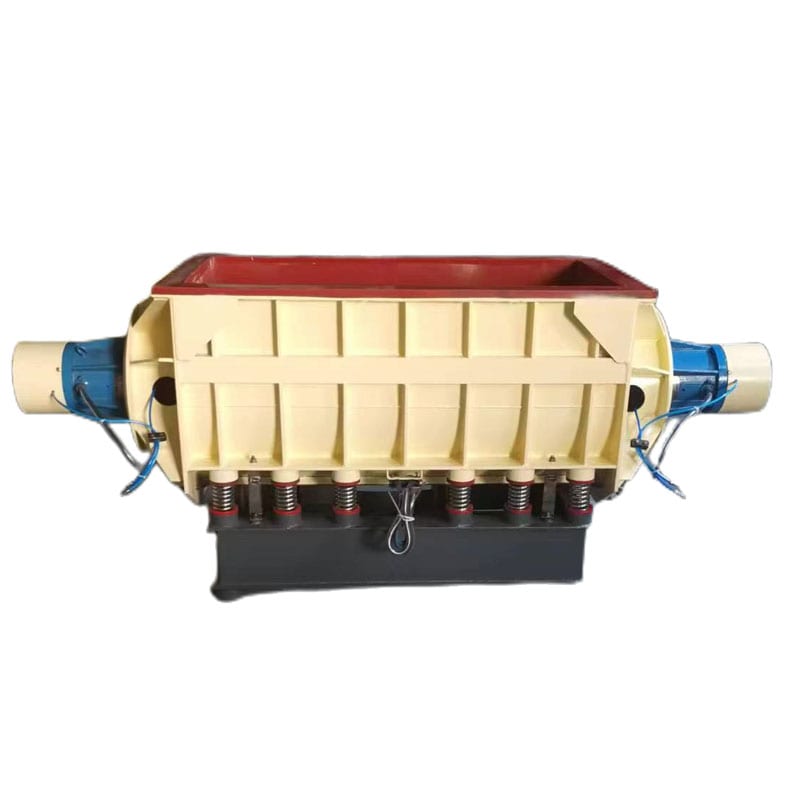
For CNC parts, brackets, and castings carrying Poisson feathers, light rollover lips, or breakout ledges, a vibratory finishing machine delivers steady scrubbing across the batch. Open spiral rolling lets operators inspect edges mid-run without stopping the drive. Paired with fast-cutting ceramic deburring media on steel, vibratory action shears sharp crests and blends uniform radii.
Centrifugal disc energy for stubborn stamping burrs on rigid small parts
Small, rigid stainless stampings, gears, and collars often carry tough exit burrs that clear slowly in a standard bowl. High-energy disc finishing machines drive the toroidal bed at much higher contact pressure, multiplying abrasive cut rate without heavy drop impact. Centrifugal disc finishing excels on compact, sturdy parts where stamping burrs resist bowl energy, provided parts are rigid enough not to warp.
Magnetic pin finishing for accessible fine feathers inside small cross-holes
Tiny precision fittings and connectors frequently carry fine drill feathers inside narrow slots and threads where ceramic or plastic stones cannot fit. Magnetic finishing machines drive fine stainless pins across recessed passages rapidly. Keep the physics clear: steel pins contain zero abrasive grit, so magnetic finishing knocks off brittle micro-feathers and brightens recesses, but folds thick rollover burrs.
Ceramic versus resin-bonded plastic media when edge cutting meets soft faces
Edge removal always touches adjacent faces. Hard steel stampings and laser brackets tolerate dense ceramic triangles that bite rapidly through oxidized roots. Soft aluminum housings, brass valves, and zinc die-castings bruise under heavy porcelain stones, so shops run cushioned plastic media with matched finishing compounds to shave Poisson fins without cratering machined sealing planes.
| Burr & Part Scenario | Machine Route | Media & Compound | Main Risk or Upstream Handoff |
|---|---|---|---|
| Poisson Fin on Soft Aluminum | Vibratory bowl | Plastic cones + LC10 / JTJ60 | Ceramic stones bruising sealing faces |
| Moderate Rollover on Steel | Vibratory bowl | Fast-cut ceramic + LC10 / JTJ25 | Oversized stones folding lip into bores |
| Breakout Ledge on Casting | Vibratory tub | Ceramic triangles + LC10 / MC8 | Stones lodging inside cored pockets |
| Stamping Burr on Flat Blank | Disc or bowl | Small angle ceramic + JTS5 | Wet flat shims clinging together |
| Micro-Feather in Small Bore | Magnetic finisher | Stainless pins + JTJ50 / HM3 | Expecting pins to cut thick rollover roots |
| Light Laser Dross on Bracket | Heavy bowl | Dense ceramic + JTJ20 / MC8 | Soft plastic skating over hard oxide |
| Thick Lathe Cutoff Pip | Lathe trim + bowl | Face stub first, then ceramic blend | Tumbling alone over-rounds shaft corners |
| Internal Cross-Hole Cap | Brush/CNC + bowl | Back-chamfer first, then batch blend | Loose media folding hidden bore hinge |
Mass Finishing Deburring Limits: When Pre-Trimming Comes First
Sound process engineering means respecting mass finishing deburring limits before ordering hardware. Loose media is an isotropic batch equalizer, not a directed cutter capable of removing bulk metal stubs selectively.
Why loose media works isotropically across every exposed corner at once
Inside a tumbling chamber, abrasive stones cannot tell an unwanted cutoff stub on one end from a tight-tolerance sharp shoulder on the other. Every exposed outer corner loses stock together while recessed pockets see gentler flow. Whenever clearing one local stub demands far more stock removal than functional corners can lose, batch tumbling alone is the wrong primary step.
When CNC chamfering, brush deburring, or trim dies must go first
Thick lathe pips, heavy die-cast gates, deep cross-hole rollover caps, and thick plasma slag belong to directed upstream tools first. In-machine CNC chamfering, casting trim dies, planetary brushes on perforated sheets, or high-pressure waterjets for deep manifolds clear localized roots selectively. See deburring equipment forms and the tool boundary for where directed tools end and loose media starts.
The hybrid sequence: targeted tool trim followed by batch edge blending
Needing upstream pre-trimming does not rule out mass finishing — in most production cells, the two steps work as partners. A CNC chamfer mill, trim press, or belt knocks off the primary stub quickly, yet leaves secondary micro-feathers and witness lines around the cut. A short vibratory pass after targeted pre-trimming sweeps away secondary feathers and blends every edge into a uniform radius across the batch.
Running a controlled sample test with untreated control parts before buying
Because burr roots thicken as inserts and dies wear, paper estimates never replace physical testing on worst-case shop parts. Ship parts taken near the end of tool life rather than pristine first-article pieces, and keep untreated control parts from that exact lot on your bench. Use our buyer checklist for preparing a surface finishing sample test so verified media, water, and compound settings replicate cleanly.
What We Manufacture, and Where Our Boundary Sits
At Xiamen Jin Tai Jin Grinding Technology Co.,Ltd., founded in 1992 in Xiamen, we inspect incoming burr roots before recommending any cell. Our production spans 21 machine platforms (8 vertical models under CE attestation certificate M.2023.206.C88121 and 13 horizontal models under M.2023.206.C88120, valid 2023-07-25 to 2028-07-24), managed under ISO 9001 certificate 00726Q01571R001 (valid 2026-06-03 to 2029-06-02) with 24 granted Chinese IP rights (1 invention patent, 17 utility models, and 6 design patents).

Equipment platforms and tumbling consumables we build in Xiamen
We manufacture mass finishing equipment and matched consumables under one roof in Xiamen. Our equipment line includes rotary barrels, vibratory bowls and tubs, centrifugal disc and barrel machines, magnetic finishers, separators, and dryers, with system records listed on certifications. Alongside hardware, we produce ceramic, resin-bonded plastic, stainless steel, synthetic, and organic dry media so machine energy and abrasive cut match.
Lead times, custom cell engineering, and wet compound formulations
Standard machines ship in twenty-five to thirty-five days, while custom builds with tailored separation decks, enclosures, or dosing ship in forty-five to sixty days. To keep stones cutting cleanly, stop flat stampings from nesting, and prevent flash rust, we formulate eight wet compounds: LC10, JTJ20, JTJ25, JTJ50, JTJ60, HM3, JTS5, and MC8. Matching compound chemistry to your alloy stops smearing and swarf redeposition.
Upstream deburring tools and thermal processes we do not manufacture
Stating technical boundaries upfront saves teams weeks of dead-end trials. We manufacture loose-media mass finishing equipment and consumables only — we do not build CNC deburring spindles, slag belt grinders, brush machines, trim dies, thermal deburring chambers, electrochemical cells, or sandblasting cabinets. We also do not supply plating, anodizing, passivation, or coating lines; when a root needs pre-trimming first, we say so during your configuration review.
Why we do not run a contract deburring job shop
Buyers researching small parts surface finishing or stamping burr removal sometimes want an outside shop to tumble batches for a fee. We do not take contract deburring, toll tumbling, or subcontract processing work — we build the machines, media, and compounds that factories and job shops run on their own floors. For an engineering assessment and equipment proposal, send part photos and edge goals via contact us.
Frequently Asked Questions
What are the main types of burrs found on machined and stamped parts?
Incoming shop-floor edge defects fall into six groups: machining rollover burrs (thick hinged exit curls), Poisson side-extrusion burrs (thin lateral fins squeezed up beside a cutter), breakout burrs (fractured negative exit ledges on brittle metals), stamping die-roll and tensile exit burrs, solid lathe cutoff pips or casting flash, and hard resolidified thermal or laser dross.
What is the difference in rollover burr vs breakout burr behavior during tumbling?
A rollover burr forms when ductile metal bends ahead of an exiting cutter without snapping off, leaving a thick hinge that heavy stones can fold across a bore if impact exceeds grit cutting. A breakout burr forms when brittle metal fractures ahead of the tool, leaving a ragged recessed ledge that loose media blends smoothly without folding risk.
Why did vibratory tumbling fold my burr into a cross-hole instead of removing it?
Burr folding occurs when stone impact force exceeds abrasive cutting speed on a ductile exit lip, or when stones cannot reach the intersection cleanly. Switching to a sharper fast-cutting grade, lowering drop impact, sizing media strictly below one-third of the opening width, or pre-clearing thick internal drill exits with a back-chamfer tool prevents peened bores.
Can mass finishing remove heavy laser dross or thick lathe cutoff pips?
Light laser spatter on rigid steel brackets clears in dense fast-cutting ceramic media dosed with JTJ20 or MC8, whereas heavy fused slag and solid lathe cutoff pips need upstream pre-trimming first. Because loose media abrades every exposed corner equally, running long enough to grind away a thick stub will over-round functional corners elsewhere.
How do you stop flat stamped parts from sticking together during stamping burr removal?
Wet flat stampings cling together under liquid surface tension, shielding trapped burrs from stones. Stop nesting by choosing angular or ridged media shapes rather than flat-sided stones, keeping sufficient media-to-part volume, and dosing our thin-sheet compound JTS5 to break wet adhesion between flat blanks throughout the cycle.
Do you offer contract deburring services, or only manufacture equipment and media?
We strictly manufacture mass finishing machines, tumbling media, and wet compounds; we never operate a contract deburring or toll-processing shop. We run controlled sample trials to verify machine configurations and consumable recipes for buyers installing equipment in-house, keeping untreated control parts from the same batch for side-by-side inspection.
 +86-592-2381506


 IPv6 network supported