Removing Scratches from Stainless Steel: Why Polishing It Out Makes It Worse
Most advice on stainless steel scratches is written for a kitchen sink: baking soda, a little oil, a soft cloth. That works because a sink is judged at arm's length in a lit room. It fails on anything with a brushed or satin finish, for a structural reason — the repair changes the texture, not the stain.
This page covers repairing external handling and service scratches: what a scratch breaks, why buffing it bright makes the panel look worse, how to restore the grain, and why passivation prevents early rust. If you are specifying a new finish rather than repairing damage, start with brushed vs satin vs mirror finish. If your scratches happen inside a tumbling bowl during production, see our guide on vibratory finishing troubleshooting.
A Scratch Is Geometry, Not Dirt
When people search how to remove scratches from stainless steel or how to clean scratches on stainless steel, the word "clean" reveals the core misunderstanding. Dirt sits on top of the metal skin. A scratch is missing or displaced metal carved below the surface plane, and no soap can wash away a trench.
The three things a scratch can break
Every external scratch on stainless steel damages one, two, or all three layers of the surface structure:
- Passive oxide film: The invisible chromium-oxide skin that prevents rust, stripped even by light scuffs.
- Visual texture: The directional brushed grain, matte satin frost, or mirror reflection.
- Base geometry: The physical sheet contour, where a gouge carves a trench and raises side ridges.
The fingernail test — one second, and it decides the route
Before picking up any pad or compound, draw the edge of your fingernail perpendicular across the scratch. This one-second check decides your repair route.
If your nail glides across the mark without catching, the scratch only disturbed the passive film and top texture peaks; you can fix it by re-blending the grain. If your nail catches in the groove, the scratch has physical depth in the base metal, requiring stock leveling before grain restoration.
Why the surface looks worse after you clean it
Buyers often wipe a scratched enclosure with a degreaser or stainless steel scratch cleaner and panic when the scratch suddenly looks twice as bright. Cleaning did not deepen the mark.
Shop dust and skin oils fill microscopic valleys and scatter light across a dirty panel. Wiping away that film exposes raw, freshly torn metal inside the scratch trench, which glares sharply against the surrounding grain.
Four scratch depths and how each one behaves
Use the four-column table below to classify the damage before choosing tools.
| Scratch Category | What Was Broken | Repairable? | Required Sequence |
|---|---|---|---|
| Superficial scuff (low-light only) | Passive oxide film | Yes | Light blending, cleaning, and re-passivation |
| Shallow scratch (nail glides over) | Texture direction and passive film | Yes | Directional grain restoration plus re-passivation |
| Deep gouge (nail catches in groove) | Geometry, texture, and passive film | Limited | Stock grinding, wide grain rebuilding, and re-passivation |
| Scratch with dent or panel warp | Sheet geometry and flatness | No | Sheet metal straightening or panel replacement |
Why Polishing It Out Is the Wrong Move
Walk through any sheet metal shop or commercial kitchen and you will spot the classic amateur mistake: a shiny oval cloud sitting right in the middle of a matte brushed door. Searching how to buff out scratches on stainless steel leads almost every beginner straight into this trap.
Note: This diagram is explained in the text and table above rather than shown as a separate figure.
What actually happens when you buff a scratch on a brushed panel
A brushed or satin stainless panel gets its low-glare appearance from thousands of microscopic valleys that scatter light. When you press a buffing wheel or rub fine polishing paste over a scratch on that panel, the fine abrasive shaves off the surrounding brushed ridges.
Within seconds, you erase the scratch — and in the exact same spot, you erase the brushed grain.
The mirror patch — the failure mode nobody warns about
On a brushed panel, removing a scratch is not about making it bright. It is about making it brushed again. If you buff a scratch to a shine, you have not repaired it — you have made a mirror patch that stands out more than the scratch did.
A thin scratch is only a narrow line interrupting the grain. A buffed mirror patch is a wide reflective window that catches every overhead light in the room. Once you polish a bald mirror spot into a brushed elevator wall or appliance door, the only cure is re-graining the entire panel face.
Where "just make it shine" works, and where it does not
Trying to buff out stainless steel scratches with fine compounds only works in three specific cases:
- The entire part is already a mirror finish: When a part starts with a full specular reflection, buffing the spot back to a mirror matches the surrounding face. See our guide on how to achieve a mirror finish on stainless steel.
- Hidden internal or structural brackets: Where visual appearance does not matter and the only goal is smoothing a sharp edge.
- Complete part refinishing: When you plan to refinish the entire workpiece uniformly in a mass finishing machine rather than spot-fixing one corner.
On any visible brushed, hairline, or satin panel, spot-buffing to a shine fails inspection every time.
The Four Repair Routes, and What Each One Restores
When engineers evaluate stainless steel scratch repair on the shop floor, practical options divide into four physical routes — plus the honest option of replacing the panel.
Hand blending — the route most shop work actually uses
For large welded enclosures, counters, and installed trim that cannot fit inside a machine, operators use hand or linear-roller blending. Using non-woven abrasive pads or linear stroke sanders, the operator strokes strictly parallel to the original mill grain to carve fresh grain lines over the scratch.
Mechanical batch finishing — when the parts are small and numerous
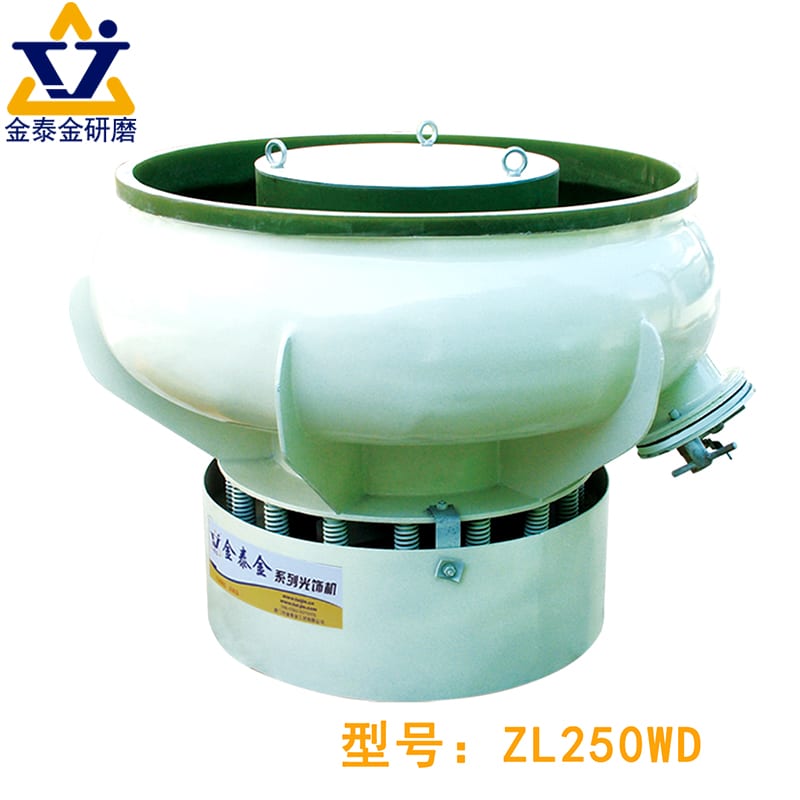
When hundreds of stamped brackets, fittings, or cutlery blanks carry handling scratches, hand blending is too slow. Parts go into a vibratory finishing machine or barrel loaded with grinding media or dry finishing media to refinish the whole batch at once.
Grinding first, when the scratch has depth
If a fingernail catches in a deep gouge, fine pads or stones ride inside the trench without removing it. Deep gouges require progressive belt or disc grinding to level surrounding metal down to the trench floor before rebuilding the grain.
Weld discolouration and seam blending — the same sequence
In sheet metal fabrication, removing weld discolouration (heat tint) and blending ground weld seams follows the same sequence as deep scratch repair. After grinding the weld bead flush, operators step through medium and fine directional blending pads until the new grain merges into the parent sheet, then passivate the weld zone.
When the right answer is "replace the panel"
Sometimes the smartest decision on how to fix scratches on stainless steel is replacing the panel. On an installed brushed curtain wall or elevator door with a deep eye-level gouge, local grinding dishes the flat sheet and leaves a visible halo in daylight. Replacing the damaged sheet is often cheaper and cleaner than days of spot rework.
| Repair Route | What It Restores | Best-Fit Workpieces | Where It Fails | Our Equipment? |
|---|---|---|---|---|
| Hand or linear blending | Local brushed or hairline grain | Flat panels, cabinets, and field work | High-volume small parts | No — hand tool work |
| Batch mass finishing | Uniform matte, satin, or burnished grade | Stampings, castings, fittings, hardware | Installed panels or hairline grain | Yes — our core lines |
| Grinding then blending | Flatness and grain over deep gouges | Heavy brackets and ground weld seams | Thin sheet prone to heat warp | No — belt grinding |
| Electropolishing | Micro-peak leveling and passive skin | Wire racks and medical manifolds | Turns brushed panels bright | No — chemical tanks |
| Panel replacement | Factory flatness and uniform grain | Gouged, dented, or PVD-coated panels | High cost on custom castings | No — replacement |
Grain Restoration: Getting Back to the Same Texture
When customers ask how to get scratches out of stainless steel or how to restore stainless steel finish on visible equipment, success depends on matching the surrounding texture family rather than just removing metal.
The three texture families, and what each needs
Stainless steel surfaces fall into three visual families, and each demands a different restoration motion.
| Texture Family | Visual Structure | Required Restoration Motion | Classic Repair Failure |
|---|---|---|---|
| Brushed / Hairline | Continuous, parallel unidirectional grit lines | Strictly straight, parallel strokes aligned with the mill grain | Cross-grain arcs, fish-hooks at stroke ends, or shiny spots |
| Satin / Matte | Short, soft, non-directional or multi-directional frost | Uniform orbital blending or batch vibratory tumbling | Directional scratch tracks or uneven glossy patches |
| Mirror / Specular | Featureless, flat reflection with zero visible grit lines | Progressive cutting and non-abrasive burnishing across the full face | Stopping a grit stage early (shiny scratches) or heat haze |
Why blending must extend beyond the scratch
The golden rule of stainless steel refinishing is that your repair zone must extend beyond the defect. Restricting your pad to the exact width of the scratch concentrates fresh grit lines inside a narrow strip and leaves a sharp boundary border.
To make the repair disappear, feather each progressive abrasive stage outward over a wider area so the new grain tapers gradually into the existing mill finish.
Note: This diagram is explained in the text and table above rather than shown as a separate figure.
The overlap rule that decides whether it looks repaired
When blending directional brushed panels by hand, never start and stop every stroke at the exact same vertical line. Stopping along one line creates a dark band of hooked grit marks at both ends of the repair. Feather your entry and exit strokes at staggered lengths so new lines interlace with the original lines.
How to check your work before it dries
Never judge a scratch repair while the metal is wet with water, oil, or compound. Liquid films fill microscopic roughness and hide texture mismatches under shop lights.
Wash the panel clean with degreaser, dry it completely, and inspect the repair under low grazing light. What you see on bone-dry steel under angled light is what the customer will see after installation.
The Step Everyone Skips: Re-Passivation
Most online guides on how to take scratches out of stainless steel stop the moment the scratch disappears visually. In industrial metalworking, stopping right after mechanical abrasion leaves the part unfinished and prone to rapid rust.
Note: This diagram is explained in the text and table above rather than shown as a separate figure.
What the passive layer is, and why grinding removes it
Stainless steel resists rust not because the bulk metal is inert, but because surface chromium reacts with oxygen to form an invisible chromium-oxide skin called the passive layer. That film grows naturally on clean metal; it is not a coating sprayed on top.
Whenever you sand, grind, buff, or tumble a scratch out of stainless steel, the abrasive rips away that passive oxide skin along with the scratch. Right after sanding, the repaired patch is bare alloy.
Why a repaired panel rusts first
Blending a scratch with a pad contaminated by carbon steel embeds free iron into the bare alloy, blocking passive film regrowth. Weeks later in humid service, rust spots break out in the exact shape of the repair stroke.
What re-passivation actually is
Re-passivating a repaired zone is not painting a sealer over the metal; it is giving clean chromium atoms at the surface the right conditions to regrow a continuous oxide skin.
First, wash the abraded zone with alkaline finishing compounds and clean water to remove metal dust and oil. Second, treat the clean steel in a citric or nitric acid passivation bath to dissolve free iron so the oxide film reforms.
Where you cannot do it, and what to do instead
On small batch parts finished in our machines, post-tumbling washing and tank passivation are straightforward. On an installed elevator wall or large tank, however, you cannot dip the panel into a bath.
Field technicians must use stainless-only pads, wash with deionized water and citric cleaner, and wipe dry so chlorides do not block film regrowth. We manufacture mass finishing machines, media, and compounds; we do not supply passivation lines or field repair services.
The DIY Advice That Makes It Worse
Searches for how can i get scratches out of stainless steel, how do you get scratches out of stainless steel, or how to get rid of scratches on stainless steel usually return household remedies. Examining how baking soda, toothpaste, oil, and vinegar act on metal explains why they fail on textured steel.
Why baking soda, oil, and toothpaste do not work on texture
Each household item fails for a clear mechanical or chemical reason:
- Baking soda and toothpaste: Ungraded mild abrasives rubbed in circles cannot cut deep scratches and leave a hazy smudge across brushed grain.
- Olive oil and mineral oil: Oils contain no abrasive; they temporarily fill grooves until the first soap wash reveals the scratch again.
- White vinegar: Dilute acetic acid cannot move metal and can etch a gray stain onto freshly abraded steel.
For a full comparison between oil cleaners and true cutting compounds, see our guide on stainless steel polish.
The two DIY methods that actually have a use
Two manual techniques mentioned in consumer guides are genuine workshop methods when used in the right place:
- Directional blending with graded non-woven pads: Stroking a fine non-woven abrasive pad strictly parallel to the original brushed grain is the exact manual blending method fabricators use on light scuffs.
- Cleaning with grit-free white nylon pads: Using a non-abrasive white pad with mild detergent lifts grease out of brushed valleys without scratching, provided you use it for cleaning dirt rather than repairing scratches.
What "non-abrasive" really means in this context
Bottles labeled stainless steel scratch remover or stainless scratch remover often print "non-abrasive" on the label as a selling point. In household cleaning, "non-abrasive" means the liquid will not scratch your appliance.
In scratch repair, however, "non-abrasive" means the product cannot move metal. Because a scratch is a physical trench in the steel, removing it requires abrading surrounding peaks down to the trench floor. A non-abrasive liquid can only hide a scratch temporarily with oil fillers; it can never remove one.
What We Do, and What We Do Not
At our Xiamen plant, founded in nineteen ninety-two, we build mass finishing equipment across twenty-one machine platforms and six product lines, backed by twenty-four authorized Chinese IP rights. Because readers on this page range from appliance owners to plant engineers, we state clearly where our equipment fits.
The routes our equipment covers
We manufacture the industrial machines and consumables that refinish stainless steel parts in batches:
- Vibratory bowls and tubs: Strip burrs and stamping scratches across batches into a uniform matte or satin grade.
- Centrifugal disc and barrel machines: Apply high sliding pressure to refine and burnish small stainless parts.
- Rotary barrels and dry media: Tumble thin parts gently or run treated walnut shell for dry brightening.
- Media and compounds: Ceramic, plastic, steel media, and free-rinsing liquid compounds.
What we do not do — plainly
As detailed on our overview of what we build and what we do not, we do not supply:
- Handheld power tools, belt sanders, or angle grinders for manual sheet blending.
- Retail consumer scratch-repair kits, household sprays, or rubbing pastes.
- Acid passivation tank lines, electropolishing baths, or PVD coating chambers.
- On-site repair services or contract job-shop processing (we sell machines and consumables; we do not process customer parts).
When refurbishment is a batch problem, not a repair problem
Here is the perspective shift that saves factories thousands of hours: scratch removal on a single part is a handcraft problem, but scratch removal across a pallet of parts is a mass finishing problem.
When a production lot of stainless kitchenware, hinges, valve bodies, or stamped covers suffers handling scratches, paying operators to blend each piece by hand destroys your margin. Running those batches through a vibratory bowl or centrifugal finisher resets the entire surface of every part to a uniform satin or burnished finish in one controlled operation.
Frequently Asked Questions About Stainless Steel Scratch Removal
Can scratches be removed from brushed stainless steel without changing the finish?
Yes, if the scratch is shallow and you restore the directional grain rather than buffing the spot with polishing paste. Stroke a matched non-woven abrasive pad strictly parallel to the original mill lines and feather the strokes outward beyond the scratch so the new grain blends seamlessly into the surrounding texture.
Does polishing a scratch out make it more visible?
On brushed, hairline, or matte satin stainless steel, yes — buffing a scratch with fine polishing compound erases the microscopic grain lines that scatter light and leaves a shiny mirror patch. That bright patch contrasts against the surrounding matte grain and stands out across a room far more than the original scratch.
Will penetrating oil or mineral oil remove scratches from stainless steel?
No. Penetrating oils, mineral oils, and cooking oils contain zero abrasive grit and cannot remove metal. Wiping oil onto a panel temporarily fills microscopic grooves so light reflects more evenly, but as soon as the oil washes off with soap or degreaser, the physical scratch returns unchanged.
Why does a repaired area rust before the rest of the panel?
Sanding or grinding strips away the self-formed chromium-oxide passive film and exposes bare alloy; pads contaminated with carbon steel also embed free iron. Without thorough cleaning and re-passivation, that bare patch rusts long before the factory surface.
Can I fix a scratch on an installed panel?
Shallow scuffs can be blended with directional hand pads, but installed panels cannot be tank-passivated and hand pressure rarely matches factory mill rolls. On visible architectural panels with deep gouges or PVD coatings, replacing the panel is often the best choice.
What is the difference between scratch removal and refinishing?
Scratch removal is a localized repair that erases an isolated mark and blends the spot into the surrounding face. Refinishing resets the entire surface texture of the part from edge to edge — either under a wide sanding belt or inside a batch vibratory or centrifugal finishing machine. To test batch refinishing on your scratched or burred stainless components, reach out on our contact page to match a machine, media, and compound setup to your parts.
 +86-592-2381506


 IPv6 network supported