Vibrating Polisher: What It Is, What It Can and Cannot Do
Ask two shops what a "vibrating polisher" is and you will get two different answers. One means the general-purpose machine that deburrs and leaves a light sheen. The other means a machine set up specifically to reach a reflective finish. The hardware is the same. The setup is not.
This page covers what the process can and cannot do, and what changes when the target moves from deburred to polished. For choosing between bowl and tub forms, see vibratory finishing machine selection. For media shapes, see vibratory tumbler media. For edge-break specs, see vibratory deburring equipment, while broader market commentary sits on our older industry-trends page.
One Machine, Several Jobs — Why the Name Is Confusing
Across metalworking shops, the same spring-mounted bowl is called a vibratory deburring machine, a vibrating polisher, or a vibrating polishing machine. Buyers searching for a vibratory polishing machine often assume it is a dedicated mirror-only machine.
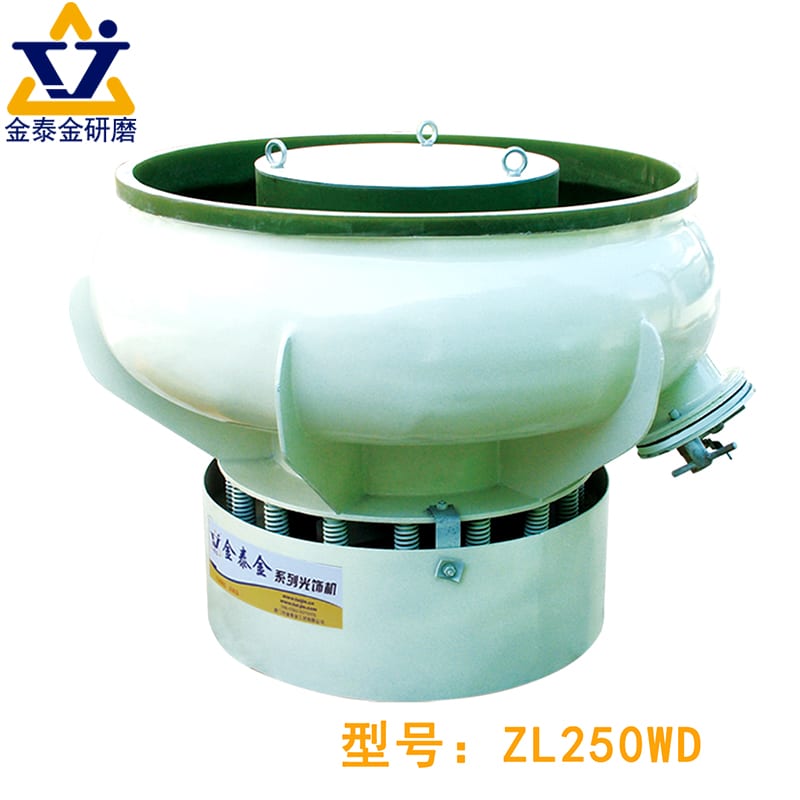
The platform is the same; the setup is not
In mass finishing, a vibratory finishing machine is a shared mechanical platform rather than a single-purpose tool. The steel chamber, polyurethane liner, springs, and eccentric motor stay identical. By swapping the media, changing the compound, and adjusting the weights, one machine performs four distinct jobs:
- Edge deburring: Coarse ceramic media strips burrs and breaks sharp corners.
- Descaling: Acidic or alkaline cleaners with cutting media strip heat scale and rust.
- Satin blending: Fine plastic or ceramic media erases CNC tool lines into an even matte skin.
- Mirror burnishing: Smooth non-abrasive or treated dry media compresses peaks into a bright reflection.
Three jobs people call "vibratory polishing"
Because the word "polish" is used loosely on the shop floor, buyers and operators use vibratory polishing to describe three very different production recipes:
- Single-stage deburring with a brightener: Running a standard deburring stone with brightening soap so parts leave clean with a light sheen.
- Two-stage satin refinement: Running a cutting stage to remove tool lines, followed by a fine smoothing stage before anodizing or plating.
- Three-stage mirror burnishing: Stepping from cutting media to blending media, then finishing in non-abrasive porcelain, steel, or treated dry media.
Why the confusion costs money on both sides
When a drawing simply says "vibratory polish" without stating which outcome is required, someone loses money. Quoting a single-stage run when the buyer expects a mirror reflection triggers a rejection, while quoting three stages for a hidden bracket loses the bid.
What Actually Happens Inside the Machine
Understanding how a vibrating polisher refines metal keeps you from buying the wrong consumables or overloading the bowl. Inside the polyurethane-lined chamber, finishing happens through continuous three-dimensional scrubbing rather than free-fall dropping.
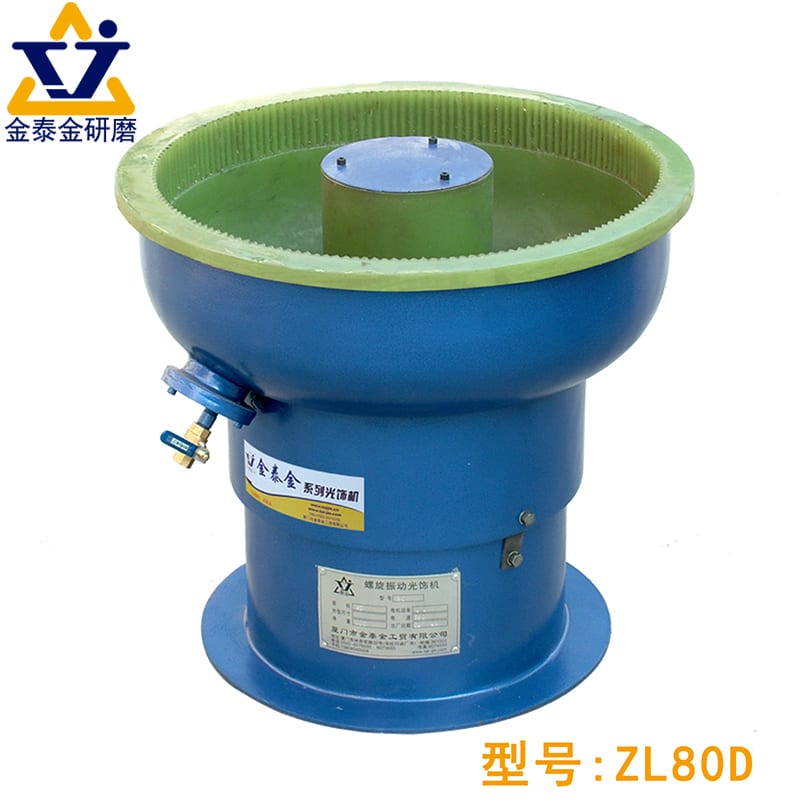
The media bed and how it moves
An eccentric motor shakes the bowl or rectangular tub vibrators with an adjustable amplitude and adjustable frequency. Each pulse throws the media bed upward and forward, driving parts and media in a continuous spiral roll around the chamber.
Because parts travel embedded inside a flowing river of media, the bed supports fragile shapes and works on corners and faces at once. The exact media-to-part loading ratio depends on part geometry and weight, and must always be set by sample trials.
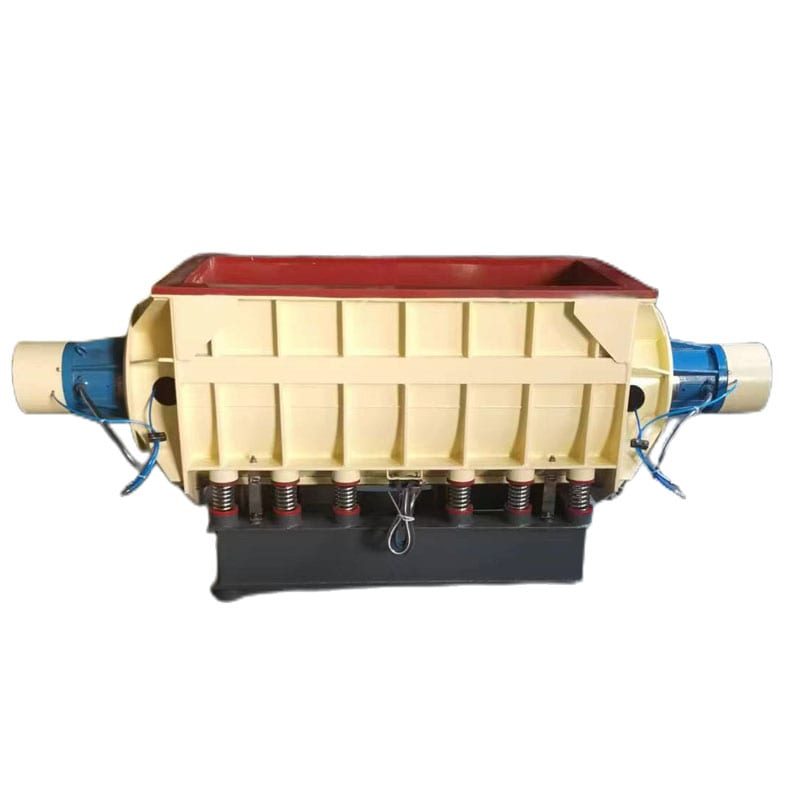
What the media does to the surface at each stage
As the media bed spirals through the bowl, individual stones or balls apply three mechanical actions to the part surface:
- Impact shearing: Angular abrasive stones strike protruding burrs and shear them off.
- Sliding abrasion: Media faces slide across parts under bed weight, shaving down tool peaks.
- Compressive burnishing: Smooth non-abrasive spheres roll micro-peaks flat without cutting so light reflects cleanly.
Why the compound matters as much as the media
Running abrasive stones in a bowl with plain tap water ruins the finish quickly. Without compound, abraded metal dust packs into the stones, parts rub metal-on-metal, and fresh surfaces oxidize into a dark gray film.
Liquid vibratory polishing consumables metered into the water perform three jobs. They lubricate contact points to control cut depth, suspend dark metal fines so they flush out the drain, and leave a rust-inhibiting film on clean metal.
What changes when you go from deburring to polishing
Converting a vibratory machine from rough deburring to fine polishing requires shifting three variables together:
- Media shifts from angular to round and dense: Sharp triangles give way to smooth cylinders, spheres, fine plastic cones, or hardened steel balls.
- Compound shifts from cleaner to high-lubricity brightener: Flushing soaps are replaced by slick burnishing compounds or dry polishing pastes.
- Machine energy and cycle structure shift: Lead-angle and amplitude settings are tuned to prevent impingement, and a single run becomes a multi-stage sequence.
What It Can Do — and What It Cannot
A vibrating polisher is one of the most versatile machines on a shop floor, yet it has strict physical boundaries. Knowing what it cannot do saves weeks of failed trials.
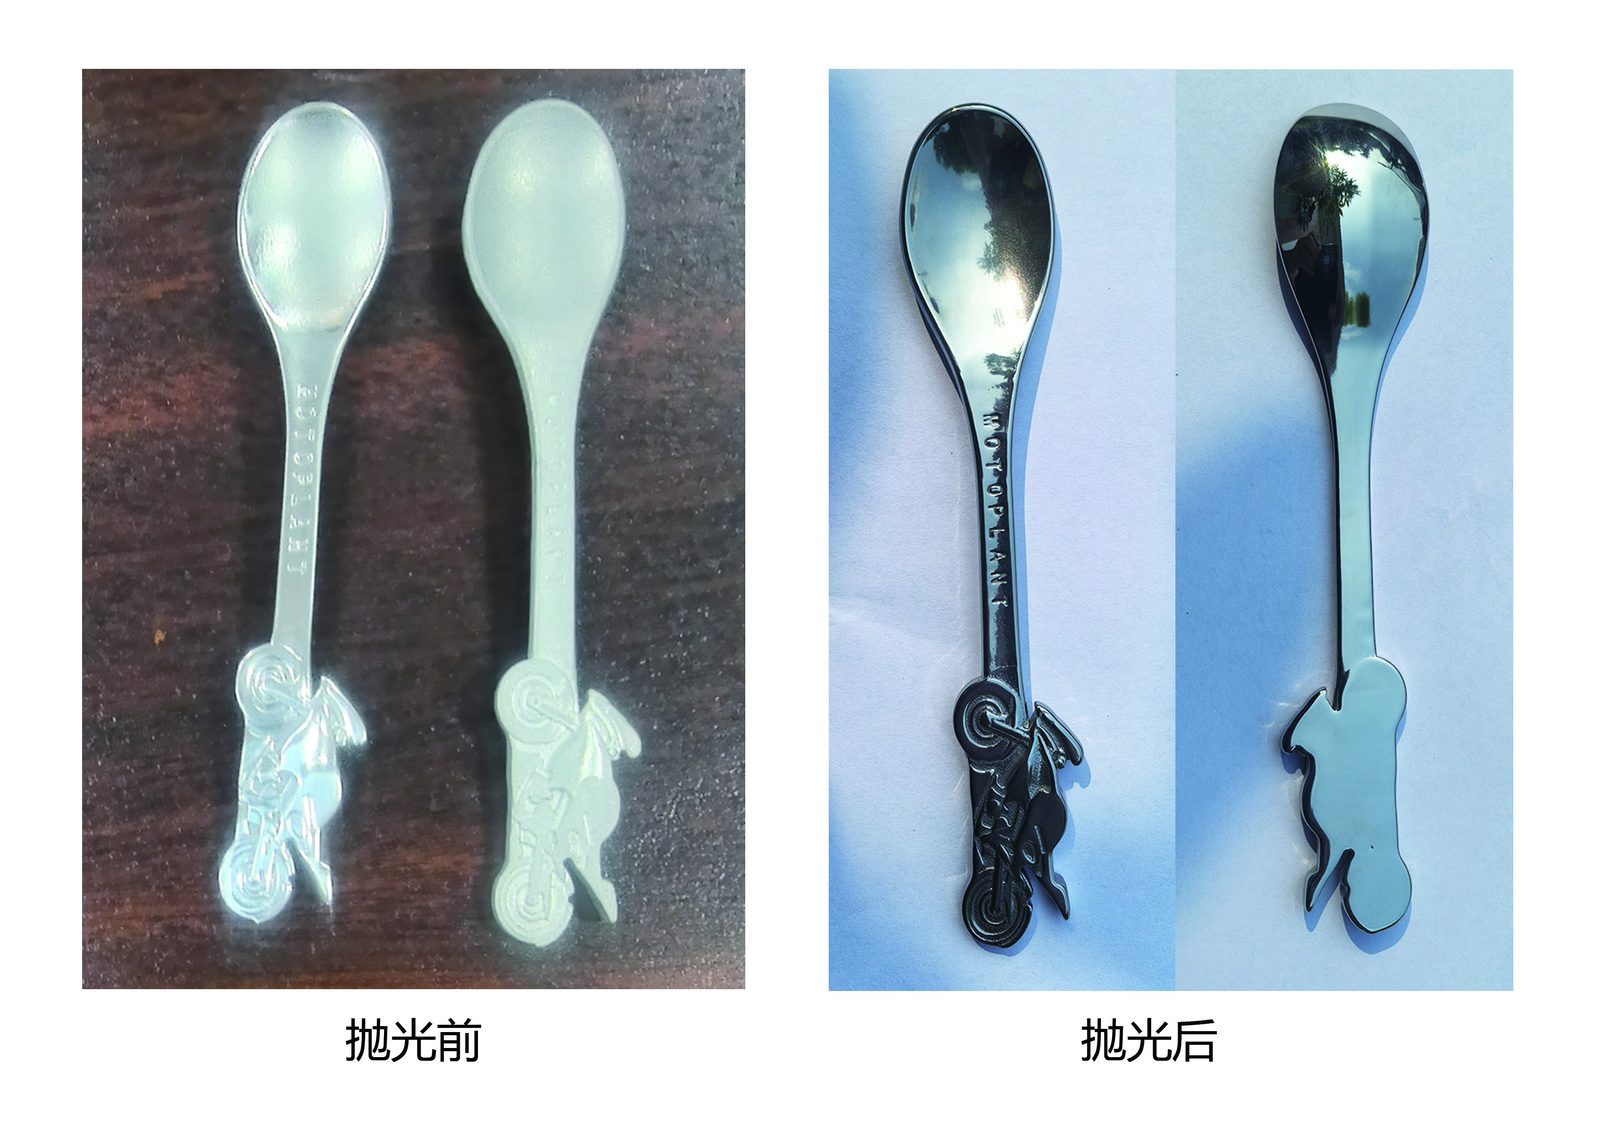
Surfaces it handles well
Vibratory polishing excels on external faces, outer corners, and shallow contours across small to medium stampings, castings, and machined parts. It strips burrs, blends light milling lines, and produces uniform matte, satin, or burnished finishes across full batches without manual racking.
Surfaces it handles poorly
Vibratory action struggles wherever media stones cannot physically reach or slide. Deep blind bores, fine internal threads, and sharp inside corners bridge over with media, leaving recessed metal untouched while outer faces polish cleanly.
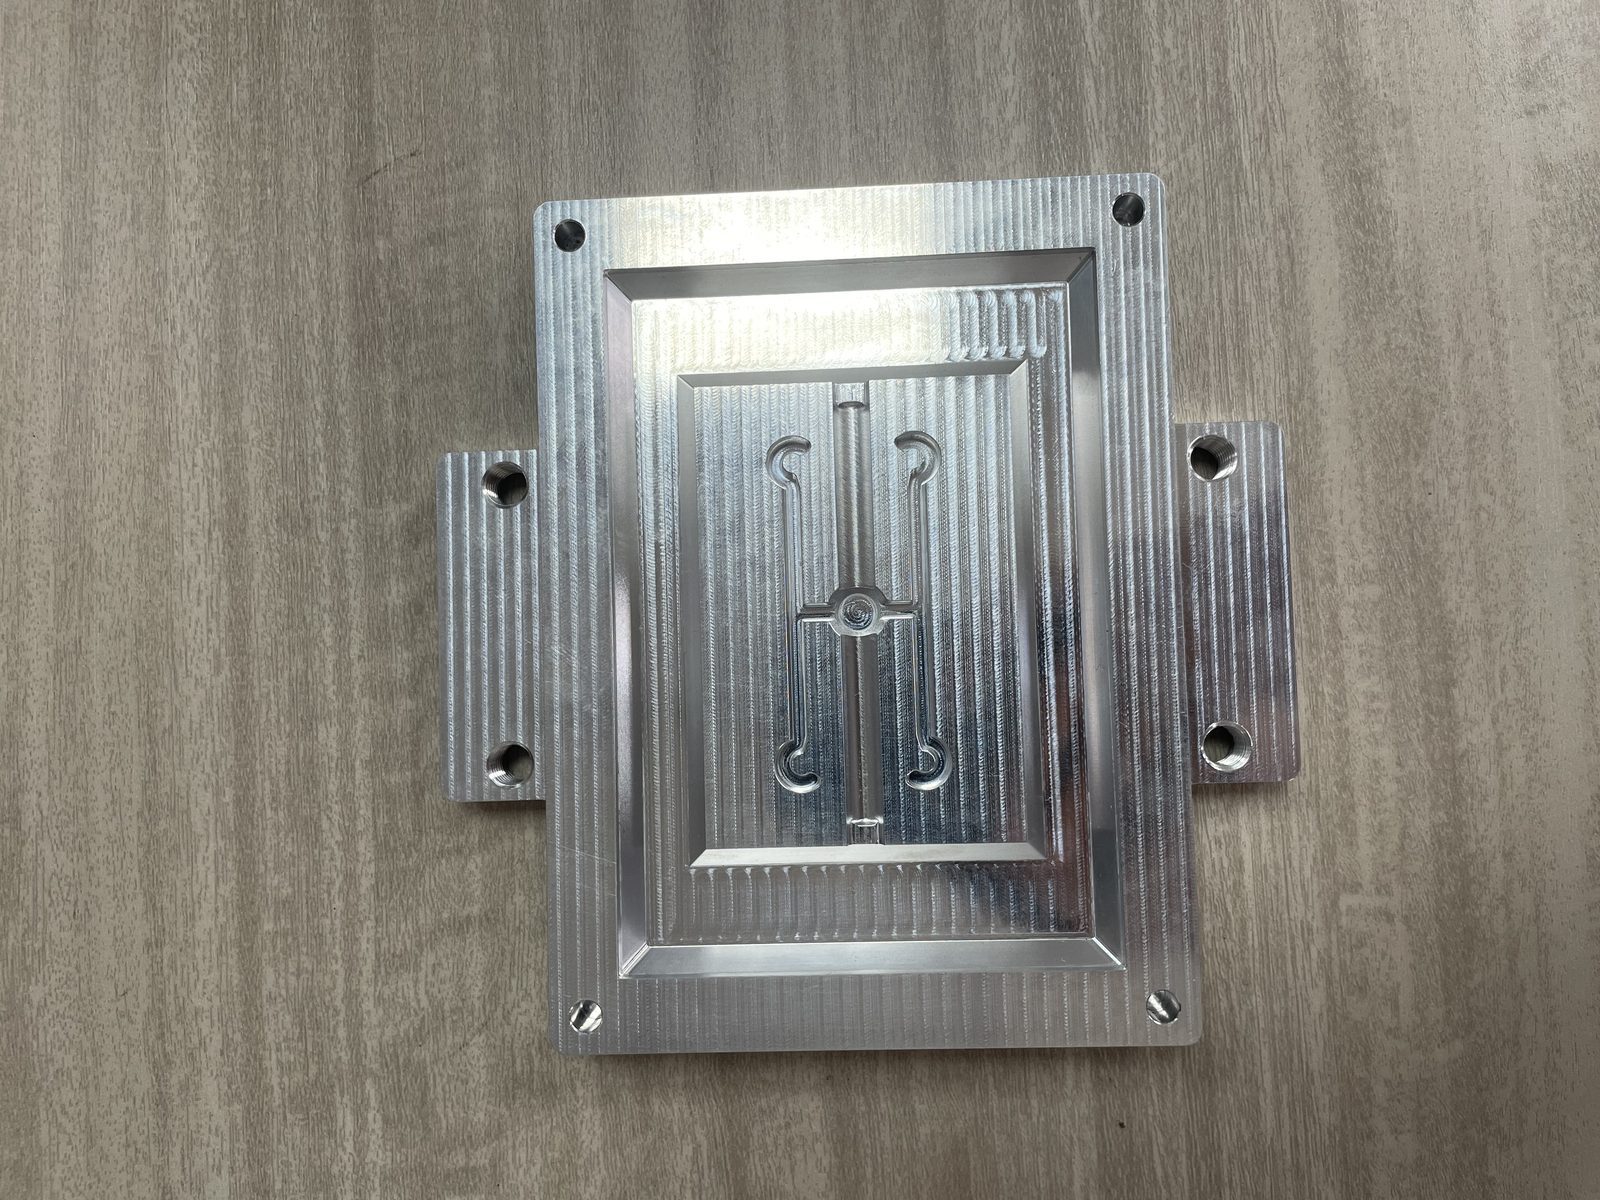
Flat, paper-thin sheet metal stampings also cause trouble because wet flat faces stick against the polyurethane wall instead of circulating with the bed.
The one thing it cannot do: change the part's geometry
Mass finishing refines surface topography; it does not machine part dimensions or change metal color. A vibrating polisher cannot flatten a warped stamping, correct an oversized shaft diameter, or erase deep gouges that catch a fingernail. Deep gouges require belt grinding or sanding before polishing, and color changes require anodizing, plating, or PVD coating.
When a different process is the honest answer
Use the four-column capability table below to see where vibratory polishing works and where another process is the honest choice.
| Your Target Goal | Can Vibratory Polishing Do It? | Shop-Floor Reality | Better Process if No or Partial |
|---|---|---|---|
| Remove burrs and radius outer edges | Yes | Core strength of vibratory finishing across batch sizes | None needed for standard parts |
| Blend out light CNC tool marks | Yes | Requires starting with an abrasive cutting media stage | Centrifugal disc for faster cycles |
| Produce a uniform matte or satin finish | Yes | Achieved reliably in a two-stage cut and blend sequence | None needed |
| Produce a bright mirror finish | Partial | Needs three stages and non-abrasive media on outer faces | Centrifugal barrel for higher pressure |
| Remove deep gouges or casting pits | No | Media rides inside deep pits without leveling surrounding metal | Belt grinding or wheel buffing first |
| Correct out-of-tolerance dimensions | No | Mass finishing acts on surface peaks, not nominal geometry | CNC machining or surface grinding |
| Change the color of bare metal | No | Mechanical tumbling only reveals natural alloy luster | Anodizing, plating, or powder coating |
| Polish a single large weldment | No | Part cannot circulate in the bowl and setup is uneconomical | Hand sanding and wheel buffing |
| Polish inside narrow cross-holes | Partial | Standard media bridges over small holes and deep slots | Magnetic pin or drag finishing |
When small precision parts need higher contact pressure to reach a mirror luster faster, compare high-energy options in our guide on centrifugal disc vs centrifugal barrel finishing.
The Three-Stage Route to a Real Polish
The biggest myth in mass finishing is that you can drop rough machined parts into one magic media and pull out a mirror finish. A true vibratory polish is a three-stage sequence where each stage prepares the surface for the next.
Stage One — cut (why you cannot start fine)
Raw parts enter the shop with burrs, cutter marks, or casting skin. Stage One uses abrasive ceramic or coarse plastic media to shear off burrs, radius sharp corners, and cut away directional machining peaks.
You cannot skip Stage One and start with fine media. Fine or non-abrasive media has no cutting bite; it simply polishes the tops of machining ridges while leaving every tool groove intact.
Stage Two — blend (the stage people skip)
Once Stage One removes burrs and tool lines, the part is covered in uniform matte scratches from the cutting stone. Stage Two switches to finer, smoother plastic or low-abrasive ceramic media to erase those Stage One scratches.
Impatient shops often skip this blending stage. Its job is bringing the surface down to a tight satin texture with shallow valleys that the final burnishing stage can close.
Stage Three — brighten (why longer is not better)
Stage Three builds true luster using non-abrasive media — such as hardened steel balls, fine porcelain spheres, or treated dry walnut shell — paired with a brightening compound.
Instead of grinding metal away, Stage Three uses compressive rolling or dry rubbing to flatten the tiny satin peaks left by Stage Two into a reflective plane. Running Stage Three too long does not increase gloss; excess burnishing work-hardens the metal skin and causes orange-peel haze.
How to tell which stage you are actually in
Hold a rinsed, dried sample part under a bright overhead lamp and tilt it at a low angle:
- Visible parallel lines or cutter tracks: Stage One is incomplete; cutting media has not reached the bottom of the machining grooves.
- Uniform matte frost with no directional lines: Stage One is complete and the part is in Stage Two; micro-peaks still scatter light evenly.
- Clear reflection of overhead lights with no underlying grain: Stage Two and Stage Three have both done their jobs.
The most common mistake: jumping from stage one to stage three
Jumping straight from coarse cutting media into burnishing creates the classic shiny-scratch defect. Heavy burnishing media flattens the top ridges of coarse scratches into bright plateaus while deep valleys remain underneath. Under angled light every scratch glares through, requiring a return to Stage Two blending media.
Media and Compound for Polishing (Not for Deburring)
Using deburring consumables for a polishing job is like waxing a car with sandpaper. To reach a satin or mirror finish, both your vibratory polishing media and your liquid compound must change character.
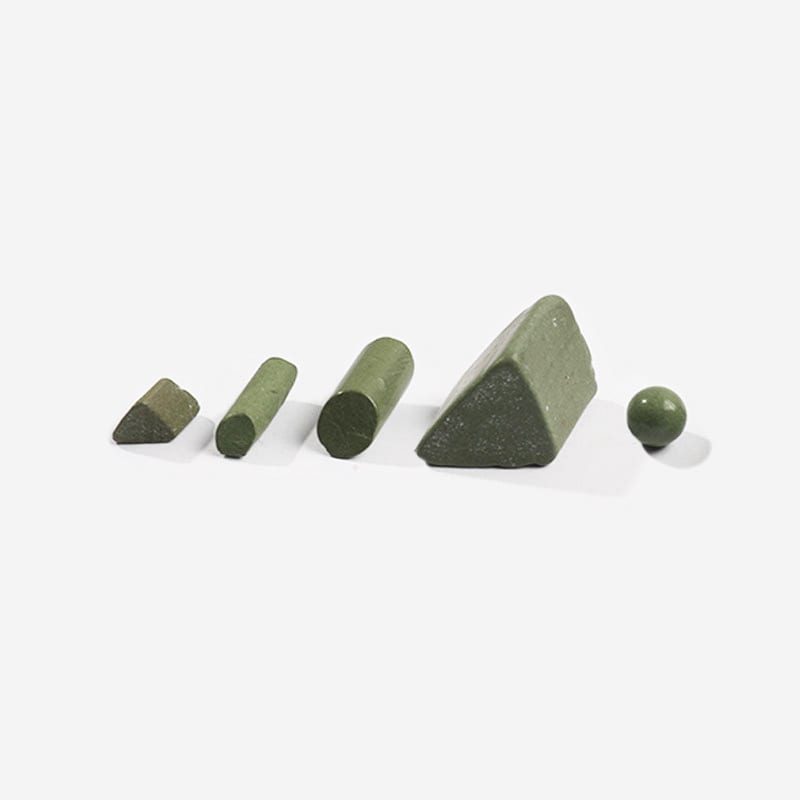
Why deburring media will not produce a polish
Deburring media contains coarse silicon carbide or aluminum oxide grit in a hard bond. As the stone wears, fresh sharp mineral points break out to cut burrs. As long as sharp grit touches your workpiece, it carves fresh scratches into the metal and prevents any mirror reflection.
Media shape for polishing: rounder, finer, denser
Moving from cutting into pre-polish refinement within our grinding media lineup shifts media geometry toward rounder contours and smaller sizes. Smooth cones, spheres, and cylinders make gentle line or point contact, blending fillets without digging into flat faces.
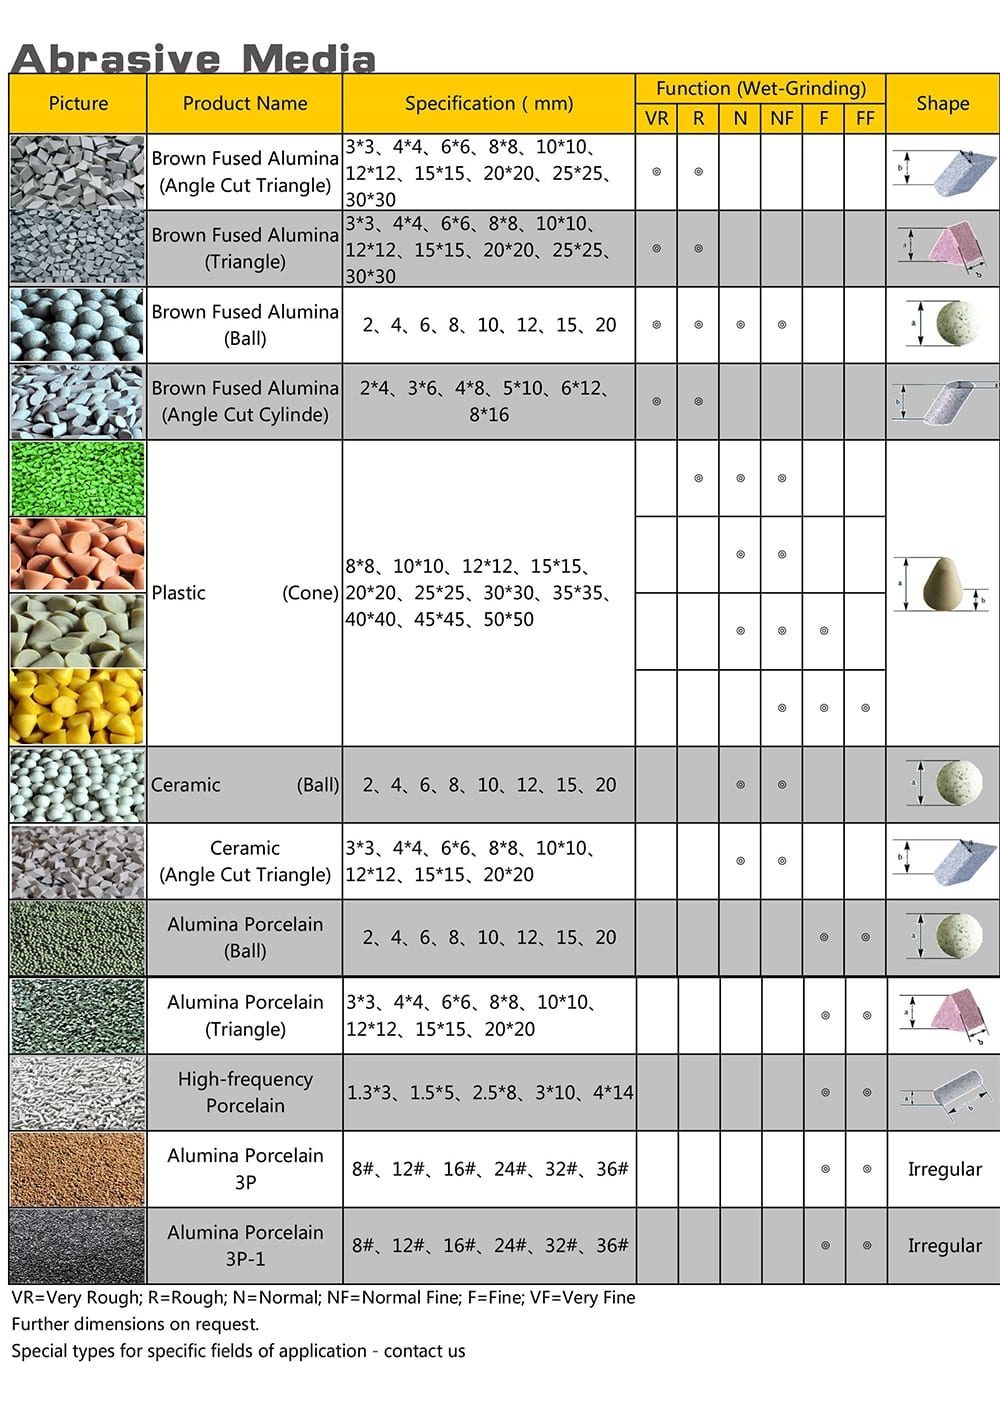
Non-abrasive media for the final stage
For the final brightening pass, abrasive grit disappears completely. Shops choose one of three non-abrasive media families based on part weight and alloy:
- Hardened stainless steel media: High-density steel finishing media delivers heavy compressive weight to burnish castings and fittings in reinforced bowls.
- Polishing porcelain media: Grit-free ceramic spheres provide a lighter burnish for delicate stainless, titanium, or aluminum parts.
- Treated dry organic media: Walnut shell or corn cob granules treated with paste run in dry bowls for a water-free final luster.
What the compound has to do differently
In a polishing or burnishing stage, water and finishing compounds must build a slick cushion between media and parts. If lubrication drops, porcelain or steel media skids across the metal and leaves chatter marks. Polishing compounds also include brighteners, water softeners to prevent mineral haze, and tarnish inhibitors to protect parts during drying.
What Goes Wrong and What It Means
When a vibratory polishing batch comes out dull, scratched, or spotted, changing cycle time blindly rarely helps. Almost every defect points to a skipped stage, contaminated media, or poor compound flow.
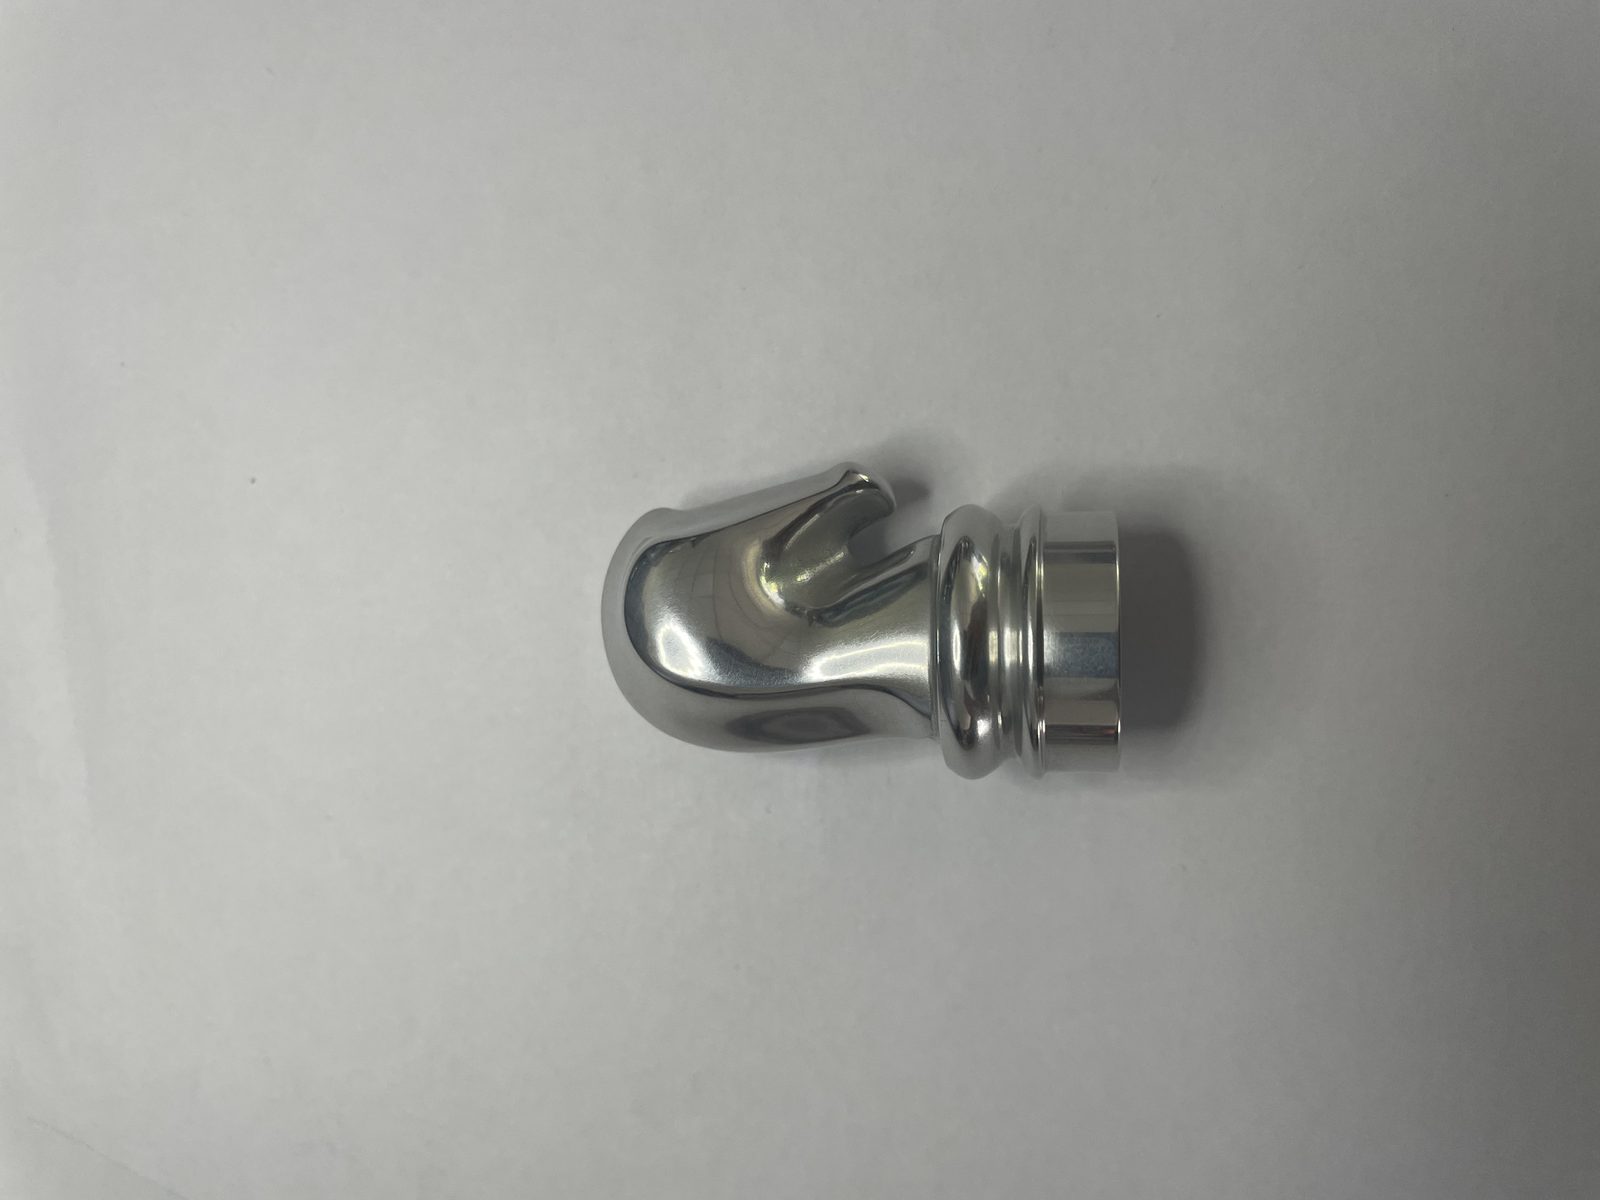
Inspecting parts under angled light before changing media
Before dumping a bowl of media, rinse one sample part in clean warm water, dry it, and inspect flat faces versus corners under angled light. A uniform film across the whole part points to compound or water chemistry, while marks concentrated on corners point to mechanical impingement.
The four-column troubleshooting table
Use the diagnostic table below to pinpoint and fix vibratory polishing failures on the shop floor.
| Surface Symptom | Root Cause | Shop-Floor Check | Corrective Action |
|---|---|---|---|
| Part looks shiny at a distance but scratched under light | Skipped Stage Two blending between coarse cut and burnish | Tilt the part under a bright lamp to spot scratch valleys | Return parts to a fine plastic or smooth ceramic blending stage first |
| Surface gets progressively cloudier in the bowl | Stray coarse grit in polishing media or low compound flow | Screen media for stray stones and check dosing pump | Flush the bowl, screen out stray media, and restore compound flow |
| Bright peening marks or tiny dents on corners | Overloaded part count or excessive vibrational amplitude | Watch the bed to see if bare parts collide at the top | Reduce batch loading, add media volume, or lower eccentric amplitude |
| Recessed slots and bores stay dull and unpolished | Media size is too large to enter and circulate in slots | Press a sample stone into the slot by hand to check fit | Add a smaller media shape or switch to pins or small spheres |
| Sharp functional edges round off beyond tolerance | Stage One cutting cycle ran too long or used harsh media | Compare edge profile against an unpolished control part | Shorten Stage One cutting and move to low-wear plastic media earlier |
| Dark tarnish, water spots, or flash rust after unloading | Hard rinse water, spent inhibitor, or slow air drying | Wipe the spot with mild cleaner to confirm surface oxidation | Dose rust inhibitor in the final rinse and dry parts immediately |
Cost: What Actually Drives It
Buyers often ask why a quote for vibratory polishing is much higher than a quote for vibratory deburring in the same bowl size. The cost difference comes from process stages and consumable handling rather than the base machine.
Five cost lines in a polishing job
Every vibratory polishing operation pays for five cost components:
- Bowl structure: Standard bowls handle cutting and porcelain, while heavy steel burnishing needs a reinforced bowl and motor.
- Media inventory: Shops must stock separate bins of cutting, blending, and non-abrasive burnishing media.
- Compound dosing: Multi-stage polishing uses both cutting cleaners and high-lubricity brighteners.
- Handling labor: Moving parts across sequential stages or swapping media multiplies operator labor.
- Drying and packing: Polished parts need immediate hot-air or cob drying to prevent water spots.
Why polishing costs more than deburring
Polishing costs more than deburring not because the machine is different, but because a real polish requires multiple stages, separate media inventories, higher compound usage, and extra handling between stages. If a vendor prices a three-stage polish like a single-stage deburr, expect a one-step shortcut that leaves tool lines showing under the shine.
Where the volume threshold sits
Swapping three media grades inside one bowl works for occasional small lots, but wastes floor time and risks grit cross-contamination in daily production. Regular batch volume justifies dedicating separate bowls to cutting, blending, and burnishing.
At our Xiamen plant, founded in nineteen ninety-two, we build equipment across twenty-one machine platforms and six product lines, backed by twenty-four Chinese IP rights. We do not offer contract polishing, plating, anodizing, blasting, heat treating, or hand tools.
Frequently Asked Questions About Vibrating Polishers
Can a vibratory deburring machine also polish?
Yes. Both use the same mechanical platform. Unless you run heavy steel media in a light-duty bowl, you do not need a new machine. Simply flush the bowl, load fine polishing media, switch to brightening compound, and run multiple stages.
How many stages does a real vibratory polish take?
A light industrial sheen takes one stage with fine ceramic media and brightener. A uniform satin base for anodizing takes two stages (cut and blend), while a reflective mirror finish takes three stages: cutting, blending, and non-abrasive burnishing.
What media should I use for polishing instead of deburring?
Replace sharp, coarse ceramic triangles with smooth, round, dense shapes. Use fine plastic cones or smooth low-abrasive ceramic cylinders for pre-polish blending. For final mirror brightening, use strictly non-abrasive media — such as porcelain spheres, hardened stainless steel balls, or dry walnut shell and corn cob granules treated with polishing paste.
Can vibratory polishing produce a mirror finish?
Yes, on external surfaces and convex contours when run through a three-stage sequence ending with non-abrasive porcelain, steel, or treated dry media. However, a vibratory bowl cannot produce a dead-flat optical mirror on large flat plates (which require flat lapping), nor can it polish deep inside narrow blind bores.
Why does my part look shiny but scratched under light?
That happens when a shop skips the Stage Two blending step and jumps straight from coarse deburring media to final burnishing media. Non-abrasive burnishing media flattens the top ridges of coarse scratches so the part reflects light, but leaves the deep scratch valleys open underneath. Step back to a medium-fine blending media to erase the deep scratches first.
How long does vibratory polishing take?
Cycle duration depends on incoming roughness, alloy hardness, target finish, media choice, and batch load. Because a three-stage mirror run takes much longer than single-stage brightening, cycle times must be set by sample trials; reach out on our contact page to test your parts.
 +86-592-2381506


 IPv6 network supported