Polishing Acrylic Edges in Production: Erasing Saw Marks and Router Lines Without Stress Crazing or Melt Smears
Signage fabricators, optical display makers, and injection-molded PMMA component manufacturers searching for polishing acrylic edges quickly discover that extruded and cast acrylic parts behave nothing like metal: solvent wipes and flame torches leave invisible internal stress that cracks weeks later into spiderweb crazing, while wet metal-style grinding turns clear PMMA cloudy white.
The central thesis of this guide is clear: production-grade polishing acrylic edges for small-to-medium parts relies on multi-stage dry mass finishing—using fine resin-bonded plastic or gentle pumice pre-smoothing to erase CNC router and saw ridges, followed by dry hardwood/bamboo peg barrel tumbling charged with specialized polishing paste and cream to bring cut edges to optical clarity without heat melting or solvent crazing. Separating mechanical edge leveling from dry paste buffing preserves crisp geometric chamfers and zero-stress optical edges across hundreds of parts per shift. For related polymer workflows, see our acrylic polish guide and polishing cream and ZAM guide.
Why Acrylic Edges Haze, Melt, or Craze Under the Wrong Process
PMMA (polymethyl methacrylate) has low thermal conductivity and high sensitivity to organic solvents, making it unforgiving under improvised edge-finishing shortcuts.
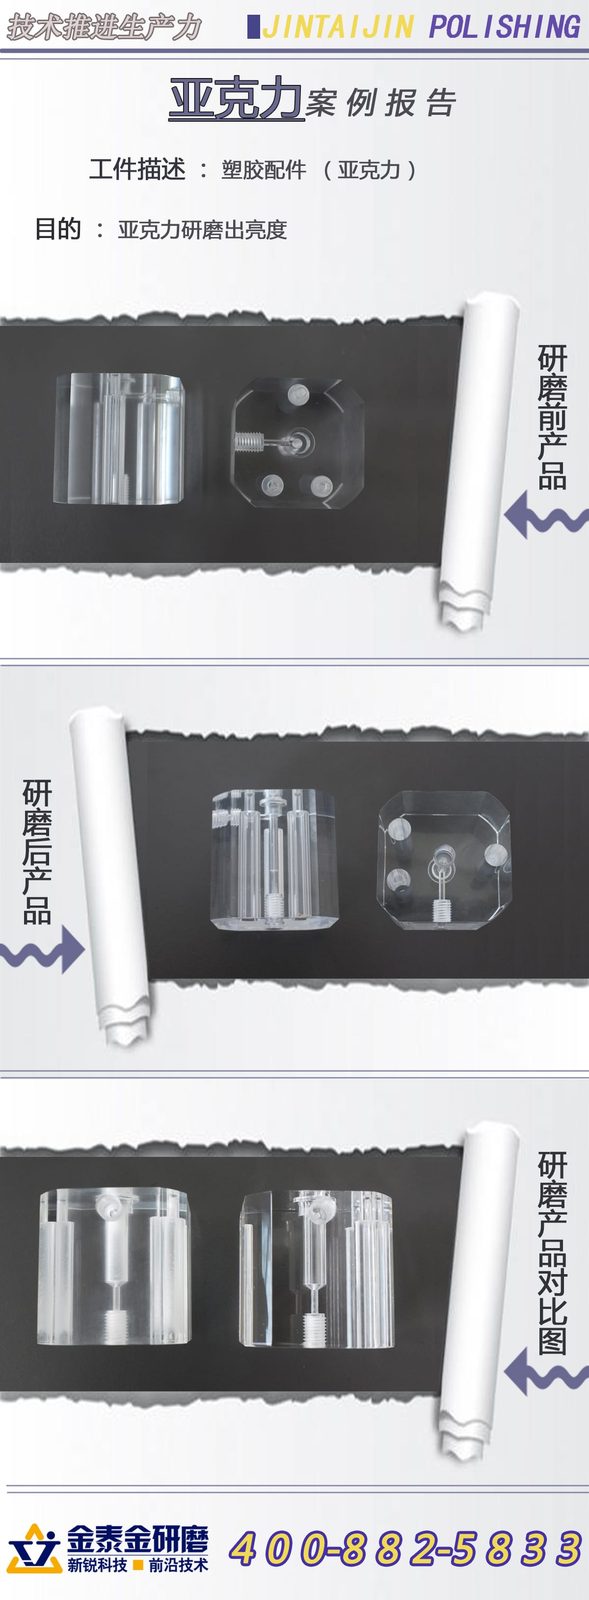
Saw Marks and CNC Router Step-Over Ridges
Table saws and CNC routers leave parallel feed striations along cut acrylic edges. Jumping straight into soft cotton buffing or fine dry wood-peg tumbling without leveling those coarse ridges first only polishes the tops of the grooves—leaving wavy optical distortion when light passes through the edge.
Thermal Softening and Melt Smears Under High-Speed Friction
Because acrylic softens rapidly under localized frictional heat, pressing a dry buffing wheel too hard or running an overloaded high-speed dry barrel without cooling breaks melts the edge surface into cloudy smears and pulls lint into soft plastic.
Stress Crazing From Extruded Acrylic Flame or Solvent Shortcuts
Extruded acrylic sheet carries locked-in manufacturing stress compared to cell-cast PMMA. Hitting extruded acrylic edges with propane flame torches or harsh alcohol/solvent cleaners triggers delayed microscopic surface fissures ("crazing") that turn clear edges frosty and brittle days after shipping. Dry mechanical mass finishing avoids chemical stress crazing completely.
| Acrylic Edge Condition | Root Cause | Why Shortcuts Fail | Mass Finishing Solution |
|---|---|---|---|
| Coarse CNC router / saw ridges | Tool feed striations | Polishing paste alone shines grooves | Stage 1 fine plastic or gentle pumice pre-cut |
| Milky frosted haze | Residual coarse scratches or dry dust | Flame/solvent risks crazing | Staged dry wood-peg + cream progression |
| Melted wavy edge corners | High-speed buffing heat | Soft PMMA smears & traps wax | Controlled-speed dry rotary barrel |
| Delayed spiderweb crazing | Solvent cleaner or flame stress on extruded sheet | Internal stress fractures over time | Mechanical dry polishing (zero solvent) |
[DESIGN: Four-panel comparison of raw CNC router edge marks, flame-crazed edge cracks, melted buffing smears, and clear dry-tumbled optical edge]
Selecting Equipment for Batch Polishing Acrylic Edges
Batch size, part thickness, and edge fragility determine whether a dry rotary barrel or a cushioned vibratory chamber fits best.
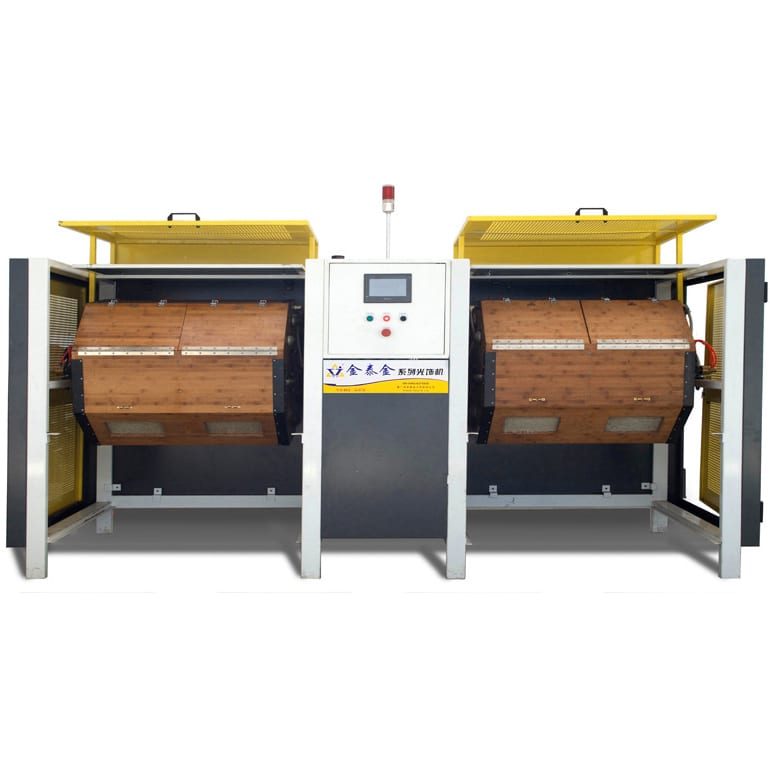
Multi-Tier Dry Rotary Barrels for Eyewear Frames, Tokens, and Acrylic Hardware
For small-to-medium laser-cut displays, jewelry clasps, optical lenses, and eyewear frames, a multi-tier dry rotary barrel polisher delivers gentle, uniform cascading motion. Hardwood or bamboo pegs coated with polishing paste glide steadily across every cut edge and bevel without slamming flat acrylic faces together.
Cushioned Vibratory Bowls for Thicker Acrylic Blocks and Machined Housings
Thicker cell-cast acrylic manifold blocks, sight glasses, and heavy display risers benefit from a polyurethane-lined vibratory grinder during Stage 1 wet plastic-cone smoothing to erase deep CNC milling lines cleanly before moving parts into dry wood-peg brightening.
Why High-Energy Centrifugal Discs and Steel Shot Never Fit Acrylic
High-energy centrifugal disc finishers and dense stainless steel burnishing balls batter soft acrylic edges, chip sharp corners, and leave pitted matte dimples across clear flat surfaces. Keep acrylic strictly inside gentle, low-impact plastic, pumice, and organic wood/bamboo media.
| Equipment Platform | Best Acrylic Edge Role | Part Collision Risk | Ideal Part Profile |
|---|---|---|---|
| Dry Rotary Barrel (Wood/Bamboo Pegs) | Final optical gloss & edge brightening | Very Low (cushioned by pegs) | Small-to-medium cut acrylic parts, frames, tokens |
| PU-Lined Vibratory Bowl (Wet Plastic) | Stage 1 erasure of deep CNC/saw marks | Low (high media-to-part ratio) | Thick machined acrylic blocks & heavy risers |
| Heated Cob Media Vibratory Bowl | Gentle oil/paste wipe & final sheen | Minimal | Post-paste clean-up on intricate pockets |
| Centrifugal Disc / Steel Ball Tumbler | Not suitable | Severe chipping & bruising | Do not use on PMMA / acrylic |
[DESIGN: Equipment workflow diagram linking Stage 1 wet plastic pre-cut, clean drying, and Stage 2/3 dry wood-peg barrel polishing]
The Three-Stage Dry Mass Finishing Sequence for Optical Edge Clarity
Achieving glass-clear edges on sawed or CNC-routed acrylic requires stepping down grit size methodically—never skipping from coarse tool marks straight to final wax polish.
Stage 1: Coarse Cut to Erase Saw Marks and Router Lines
If edges arrive with visible saw kerf marks or CNC step-over ridges, start with fine resin-bonded plastic media (wet with mild neutral soap LC10 or JTS5 in a cushioned vibratory bowl) or a coarse dry barrel mix of wood pegs and fine pumice powder with conditioning oil. This stage converts rough directional tool lines into a uniform, velvety matte frost.
Stage 2: Medium Cut With Fine Polishing Cream and Bamboo/Hardwood Pegs
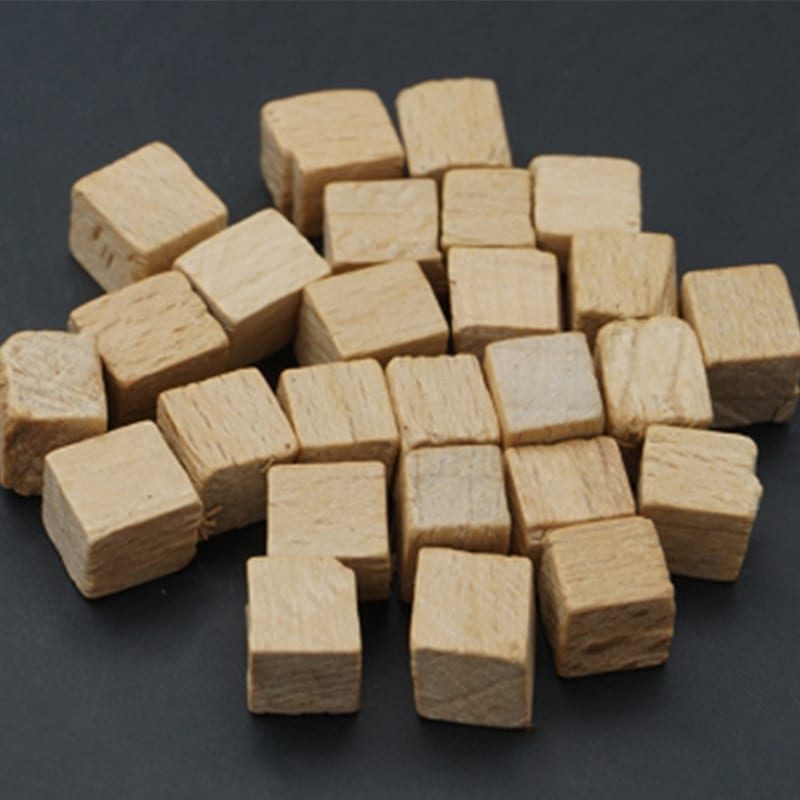
Rinse and dry parts completely if Stage 1 ran wet, then transfer them into a clean dry rotary barrel loaded with seasoned hardwood or bamboo pegs dressed in fine cutting paste or polishing cream. Medium-stage tumbling erases the Stage 1 matte frost and brings cut edges to a semi-gloss translucent sheen.
Stage 3: Final High-Gloss Buffing With Clean Dry Pegs and Brightening Wax
Transfer parts into a dedicated final-polish barrel containing clean, wax-conditioned wood pegs or dry corncob media with minimal brightening compound. Final tumbling wipes away microscopic paste haze and leaves edges crystal-clear with crisp, light-transmitting bevels.
Never Mix Coarse Pumice Pegs With Final Mirror Pegs
A single pinch of Stage 1 pumice dust inside your Stage 3 brightening barrel permanently contaminates the wood pegs and leaves fine swirl haze on every subsequent batch. Always dedicate separate labeled barrels or removable drum liners to each stage.
Conditioning Wood and Bamboo Media With Polishing Paste
Fresh dry wood pegs straight out of the bag cannot polish acrylic cleanly until they are properly seasoned ("charged") with polishing cream and conditioning oil.

Avoiding Clumped Paste Balls and Sticky Residue
Dumping a thick blob of polishing paste onto dry pegs alongside acrylic parts glues greasy wax lumps straight onto flat acrylic faces. Always tumble the empty wood pegs with measured paste and conditioning oil first until every peg carries a dry, even, satin coating before loading acrylic workpieces.
Controlling Barrel Temperature to Prevent Edge Softening
Dry friction generates gradual warmth inside sealed rotary drums. Keep batch fill levels balanced, avoid over-speeding drum RPM, and monitor barrel warmth during long runs so acrylic edges never reach their softening point.
Recharging Media Without Over-Wetting
As pegs lose glossing speed over multiple shifts, add a small measured refresh of polishing cream and run empty briefly to redistribute—never soak pegs in excess oil that smears across clear faces.
Separating Wood Peg Dust From Finished Acrylic Parts
Over repeated dry cycles, fine acrylic wear powder and dried polishing cream accumulate at the bottom of the barrel. Screen your wood or bamboo pegs periodically over a clean mesh tray to shake out spent dust while keeping seasoned pegs intact—ensuring every fresh batch tumbles in clean, high-clarity media rather than gray powder buildup.

Protecting Flat Acrylic Faces While Polishing Cut Edges
A common fear when polishing acrylic edges in bulk is scratching the large clear front and back viewing faces.
Keeping Protective Kraft Paper or PE Masking Film on Flat Faces
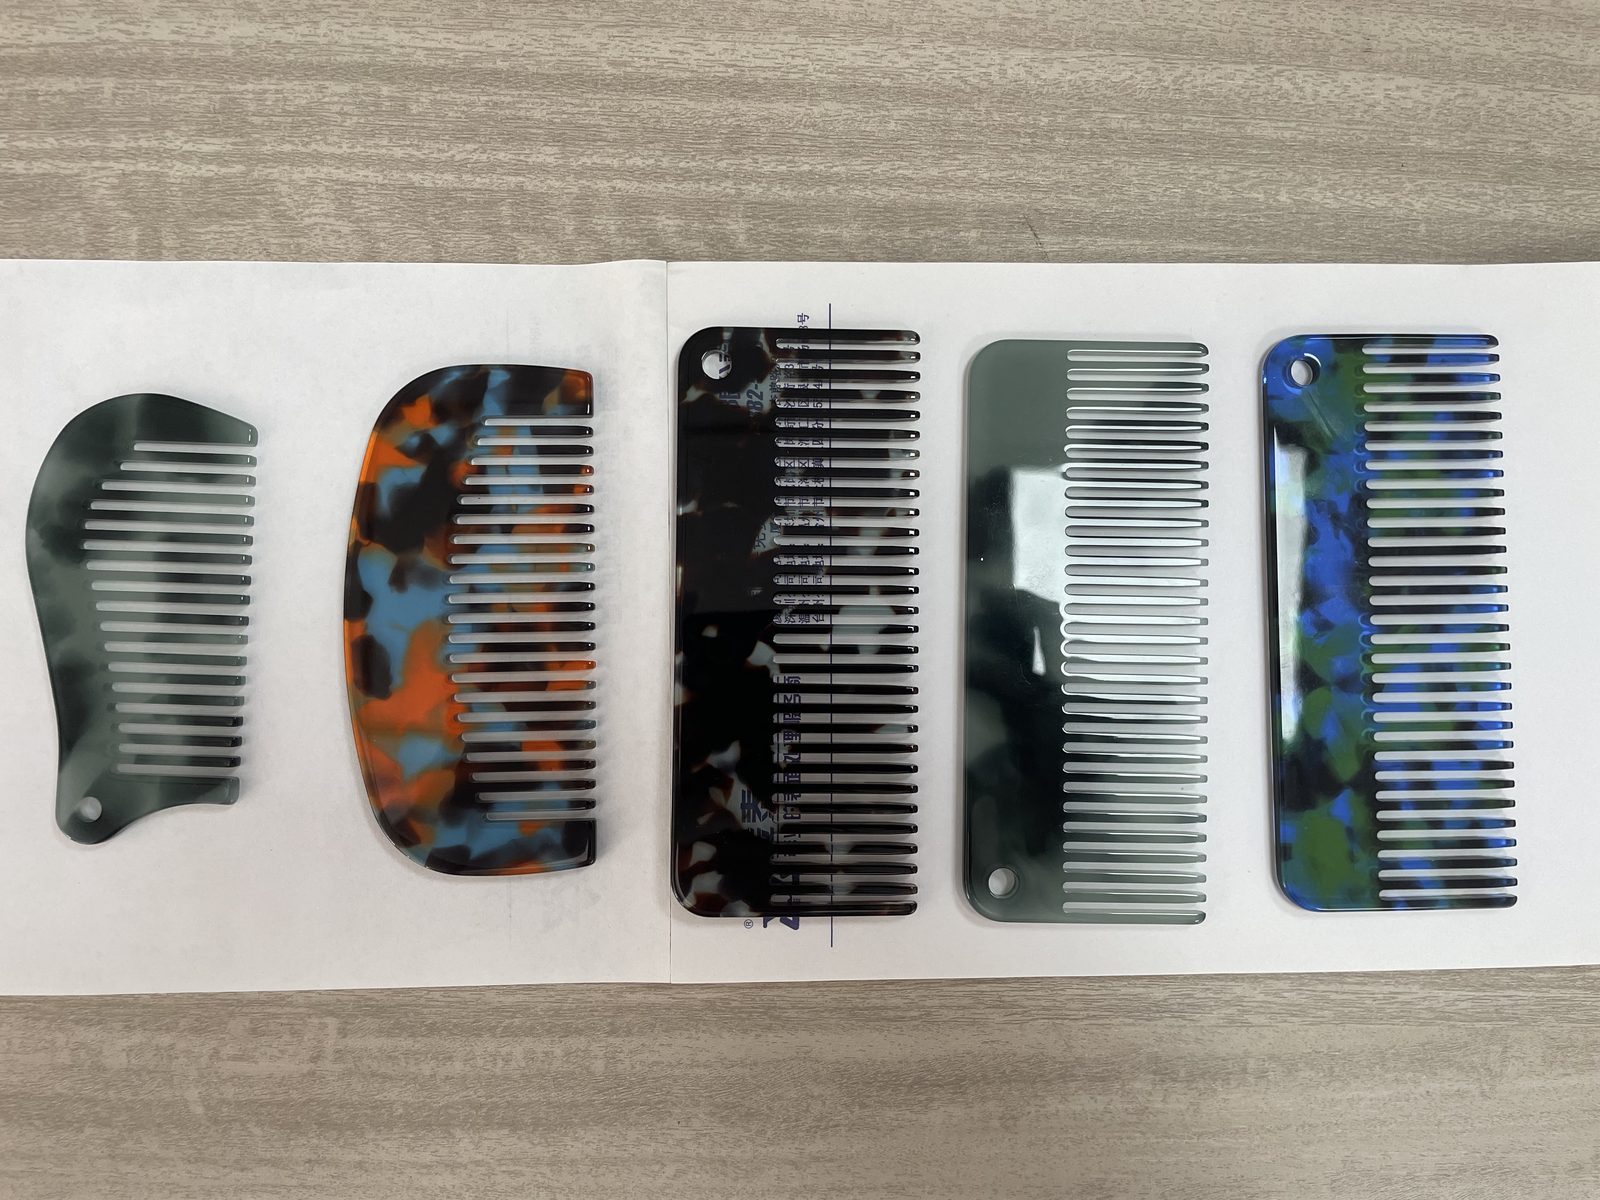
Whenever possible, leave factory PE film or adhesive paper masking on the large flat faces during laser cutting or CNC routing, and run Stage 1 edge smoothing with the flat faces still masked. Peel masking off only before the final gentle brightening stage if edge-to-face transitions need uniform sheen.
Maintaining High Media-to-Part Volume Ratios
When unmasked acrylic blocks must tumble in bulk, keep a generous volume ratio of smooth wood pegs or fine plastic cones surrounding every piece so flat faces glide against soft wood media rather than striking neighboring acrylic corners.
Sizing Acrylic Blocks Away From Barrel Bridging
Large flat acrylic display panels (such as full storefront sign sheets) cannot tumble inside rotary barrels—they bridge the drum and snap or scratch. Automated barrel and vibratory mass finishing fits small-to-medium cut blocks, eyewear frames, optical tokens, buttons, and machined PMMA fittings.
Common Failure Modes When Polishing Acrylic Edges
Recognizing these four defects stops batch scrap immediately.
[DESIGN: Troubleshooting gallery showing hazy gray wax film, frosted un-leveled router lines, chipped sharp corners, and crazed extruded edges]
Persistent Router Lines Shining Through a Glossy Skin
If edges look shiny yet still show wavy vertical bands under angled light, Stage 1 cut duration was too short. Return to Stage 1 plastic or pumice pre-smoothing until every router line disappears into uniform matte frost before moving to Stage 2.
Greasy Wax Haze Coating Clear Faces
Excess polishing cream or oil on wood pegs leaves an oily rainbow film across acrylic surfaces. Run finished parts briefly in clean, un-oiled dry corncob or fresh dry wood pegs to wipe residual cream film clean.
Chipped Corners on Thin Cast Acrylic Pieces
Overloading a rotary barrel with too many parts and too few wood pegs lets sharp acrylic corners collide during the cascade drop. Increase peg-to-part volume ratio and slow barrel rotation speed.
Cloudy White Spots After Wet Stage 1 Rinse
Hard tap water drying slowly on pre-smoothed PMMA leaves chalky mineral spots that get sealed in during dry polishing. Rinse Stage 1 wet parts with clean softened water and blow or spin-dry thoroughly in a heated dryer (keeping air temperature safely below acrylic softening limits) before loading dry barrels.
Honest Boundaries: What We Do and Do Not Supply
At Xiamen Jin Tai Jin Grinding Technology Co.,Ltd. (brand: Jings Polish), our workshop roots date back to 1996 and our company was formally established in 2009, delivering over 200,000+ sets of grinding and polishing solutions worldwide. Across our catalogue, we manufacture 21 machine platforms backed by 24 granted Chinese IP rights (1 invention patent, 15 utility model patents, and 8 design patents), under ISO 9001 certification 00726Q01571R001 (valid 2026-06-03 to 2029-06-02) and CE certifications M.2023.206.C88121 (Vertical, 8 models) and M.2023.206.C88120 (Horizontal, 13 models), valid until 2028-07-24.

Equipment, Media, and Compounds—Not Contract Acrylic Polishing
We manufacture and supply dry rotary barrel polishers, polyurethane-lined vibratory bowls, wood/bamboo pegs, resin-bonded plastic media, corncob media, and polishing creams/compounds for your own production line. We do not run a contract job-shop polishing service for customer signage or acrylic blocks. Standard machines ship in 25–35 days, while custom multi-tier barrel lines require 45–60 days.
No Flame Torches, Solvent Vapor Polishers, or Diamond Edge Millers
We do not supply propane/hydrogen flame polishers, dichloromethane solvent vapor chambers, single-point diamond edge-planing machines, or CNC routers. Mass finishing is the right solution when you need stress-free, batch-repeatable mechanical smoothing and dry optical polishing on small-to-medium cut acrylic parts—whereas oversized architectural sheets belong on dedicated single-sheet diamond edge millers.
Engineering Review Before Equipment Sizing
Because sheet thickness, cast vs. extruded PMMA, starting router-line depth, and masking state determine whether you need a wet plastic pre-cut bowl plus dry rotary barrels or dry barrels alone, we do not promise free mail-in sample trials or guarantee cycle times before inspecting your parts—send clear photos of your cut acrylic edges and part dimensions via our custom polishing solution page for an engineering assessment.
Buyer Checklist & FAQ for Polishing Acrylic Edges
Use these practical benchmarks before specifying equipment for batch acrylic finishing.
[DESIGN: Annotated acrylic edge polishing enquiry checklist showing sheet thickness, cast vs extruded grade, edge roughness, and batch size]
Can I polish laser-cut acrylic edges directly in a dry barrel without wet Stage 1 cutting?
Clean laser-cut cast acrylic edges already have a smooth melted wall and often need only Stage 2/3 dry wood-peg brightening if light frost or protective paper residue remains—whereas sawed or CNC-routed edges with visible tool ridges always require Stage 1 mechanical leveling first.
Why shouldn't I use alcohol to wipe acrylic parts clean before or after barrel polishing?
Isopropyl alcohol and harsh solvents trigger rapid microscopic stress crazing on extruded and laser-cut acrylic edges. Clean finished parts only with mild soap and water or clean dry corncob/soft cloth wipes.
How long do hardwood and bamboo tumbling pegs last before needing replacement?
Dry wood and bamboo pegs last across many batch cycles as long as you keep them dedicated by stage, screen out worn dust periodically, and refresh polishing paste in light, measured doses without over-oiling.
Can the same rotary barrel polish both acrylic blocks and metal hardware?
Never share barrels or wood pegs between metal hardware and clear acrylic. Even microscopic metal wear dust embedded in wood pegs scratches soft PMMA surfaces instantly.
What is the difference between polishing cell-cast acrylic and extruded acrylic in a dry barrel?
Cell-cast acrylic has higher molecular weight and better thermal stability, tolerating slightly longer dry barrel friction before warming, whereas extruded acrylic softens at lower temperatures and crazes rapidly if exposed to solvents or excess heat. For extruded acrylic batches, keep barrel RPM moderate, avoid overfilling the drum, and stick strictly to dry mechanical paste polishing without alcohol wipes.
How do I polish bevels and chamfered edges on thick acrylic awards without rounding sharp corners?
Sharp 90-degree corners soften gradually during extended Stage 1 ceramic or heavy plastic cutting. Keep Stage 1 wet plastic-cone smoothing strictly as short as needed to erase saw or router striations, then rely on gentle dry hardwood or bamboo pegs charged with fine polishing cream to bring chamfered faces to glass-like transparency while preserving crisp architectural lines.
Can colored or frosted acrylic sheets be edge-polished with the same barrel media?
Transparent tinted acrylic edge-polishes beautifully to jewel-like clarity using the same three-stage sequence. Matte frosted sheets, however, will gradually gloss up along exposed faces if tumbled unmasked—so leave protective paper or PE film on frosted flat faces during dry edge brightening.
Why do small laser-cut acrylic letters sometimes stick together in dry barrel polishing?
Static electricity builds up rapidly inside dry tumbling drums in low-humidity shops, causing thin flat acrylic cutouts to cling together or stick to barrel walls. Maintaining light, measured conditioning oil on the wood pegs and keeping the peg-to-part volume ratio generous breaks static lock so every letter tumbles freely.
How do I know when wood pegs need re-seasoning versus full replacement?
If edges come out slightly dull despite normal cycle times, the pegs simply need a measured refresh of polishing cream and conditioning oil tumbled empty before the next batch. Replace wood or bamboo pegs only after prolonged use rounds and shrinks them down into fine splinters or dust that can no longer cushion parts effectively.
Can vibratory bowls with dry wood pegs replace rotary barrels for acrylic edge polishing?
Dry rotary barrels remain the primary workhorse for Stage 2 and Stage 3 wood-peg acrylic polishing because their gentle rolling cascade keeps dry paste-charged pegs in continuous sliding contact without excessive dust scatter or heat buildup. Vibratory bowls excel during Stage 1 wet plastic-cone smoothing when thick CNC-machined acrylic blocks carry deep milling cusps that need rapid mechanical leveling before dry barrel brightening.
How should acrylic parts be cleaned after dry wood-peg polishing before final packaging?
Finished parts emerge from dry wood-peg tumbling with virtually zero wet residue, carrying only light dry static dust at most. Blow parts gently with clean, oil-free ionized compressed air or tumble briefly in a clean dry corncob bowl to wipe away faint paste haze—never wipe freshly polished acrylic edges with alcohol, acetone, or harsh glass sprays that trigger delayed stress crazing.
Why do thick acrylic blocks sometimes show faint edge rounding after Stage 1 plastic pre-cut?
Extended wet cutting with resin-bonded plastic cones removes material across both the cut edge and the sharp 90-degree corner transition. If architectural display blocks require crisp razor-sharp corners, keep Stage 1 plastic pre-cut as brief as possible, optimize upstream CNC climb-milling feeds to leave lighter tool marks, and let gentle Stage 2/3 wood pegs do the optical brightening.
Can batch barrel polishing handle acrylic blocks with deep milled pockets or engraved lettering?
Yes, though deep narrow pockets require matching peg size to pocket width so wood or bamboo pegs circulate inside the recess without wedging. When delicate engraved lettering must stay razor-crisp without wax buildup, keep Stage 2 polishing cream light and finish with clean dry corncob tumbling to wipe fine crevices completely clear.
What details should I share before requesting a quote for acrylic edge polishing equipment?
Send clear close-up photos of your raw sawed, routed, or laser-cut acrylic edges, overall part length/width/thickness, whether parts are cell-cast or extruded PMMA, whether flat faces carry protective masking film, and your hourly or daily batch target. Also mention whether any internal holes or thin display slots could trap tumbling pegs. Our engineers will recommend the right dry rotary barrel setup, cushioned vibratory pre-cut bowl (when needed), seasoned hardwood or bamboo peg grades, and polishing cream sequence.

 +86-592-2381506


 IPv6 network supported