Acrylic Polish in Production: Choosing the Right Acrylic Polisher and Mass-Finishing Route
Getting a clean acrylic polish on one display block with a handheld rag is easy. Getting the same optical clarity across hundreds of machined, laser-cut, or moulded PMMA parts in a single shift without melting edges, clouding flat faces, or blowing out tolerances is a completely different workshop problem. Most buyers searching for an acrylic polisher run into confusion because the same phrase covers hobby buffing wheels, flame torches, chemical vapour tanks, and industrial batch tumbling systems.
This guide lays out how acrylic polishing works on a production floor, when batch mass finishing beats manual wheel work, and how to polish acrylic cleanly without damaging heat-sensitive plastic. For broader equipment terminology across our catalogue, see finishing machine names.
Why Acrylic Behaves Differently From Metal
Acrylic (PMMA) is an amorphous thermoplastic, not a ductile alloy. That single fact changes every rule you may be used to from metal finishes: heat builds up instead of conducting away, sharp abrasives smear instead of cutting cleanly, and the wrong solvent causes stress crazing hours after the part leaves the machine.
Heat buildup softens and smears the surface
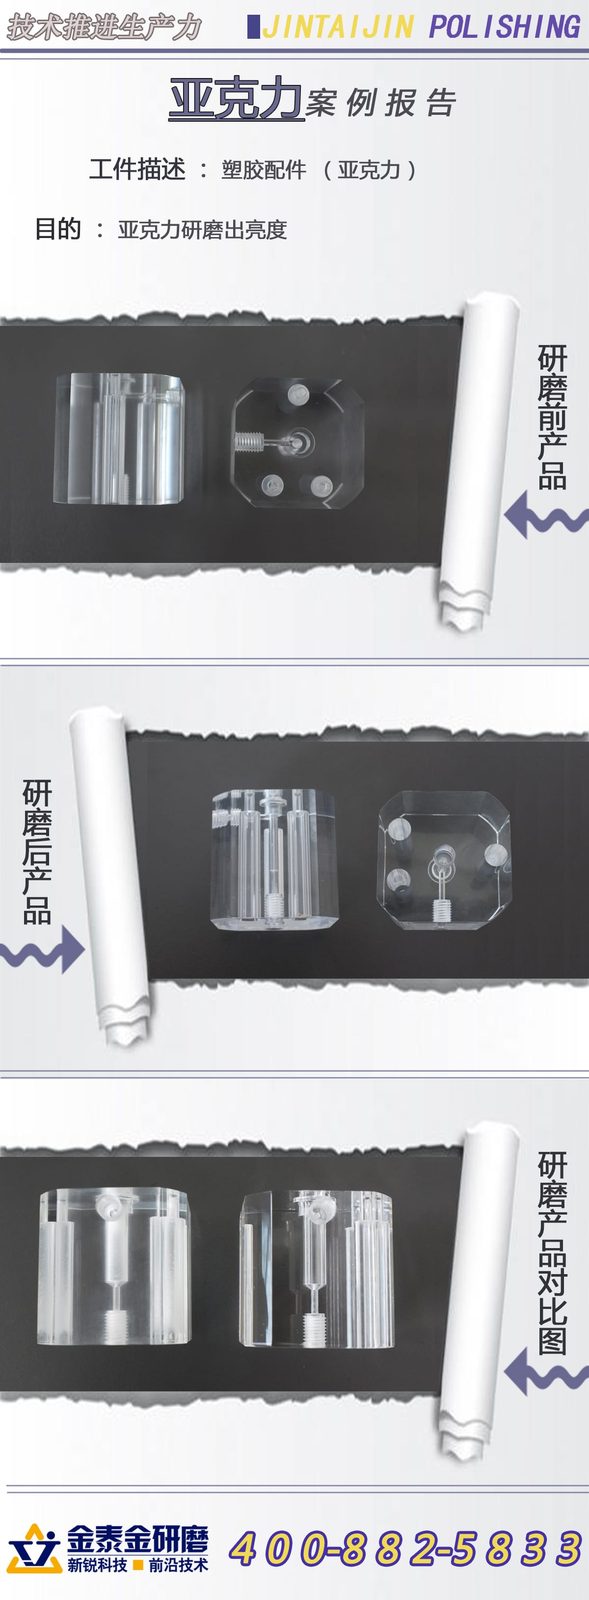
Metal conducts friction heat away from the contact zone into the body of the part. Acrylic insulates the contact spot, so localized friction raises surface temperature rapidly until the polymer softens, smears, and turns milky. Controlling friction heat is the primary constraint in every acrylic polish workflow. Dry runs that move too fast or lack lubrication glaze the media and cloud the part instead of cutting it clear.
Solvents and alcohol trigger delayed crazing
Many shops wipe machined PMMA with strong solvents or alcohol-based cleaners before or after polishing, only to see spiderweb micro-cracks appear days later. Machined and laser-cut acrylic carries residual internal stress along the cut edge. Exposing stressed acrylic edges to incompatible solvents or harsh compounds unlocks immediate or delayed stress crazing, ruining parts that looked clear on the inspection bench.
Softness means media weight can dent flat faces
Compared with stainless steel or brass, cast and extruded acrylic scratches and dents easily under heavy point loads. High-density ceramic or steel media that works well on metal will peen flat acrylic faces into an orange-peel texture. Matching media weight and shape to PMMA softness prevents surface bruising during batch tumbling.
Edge geometry vs optical transparency
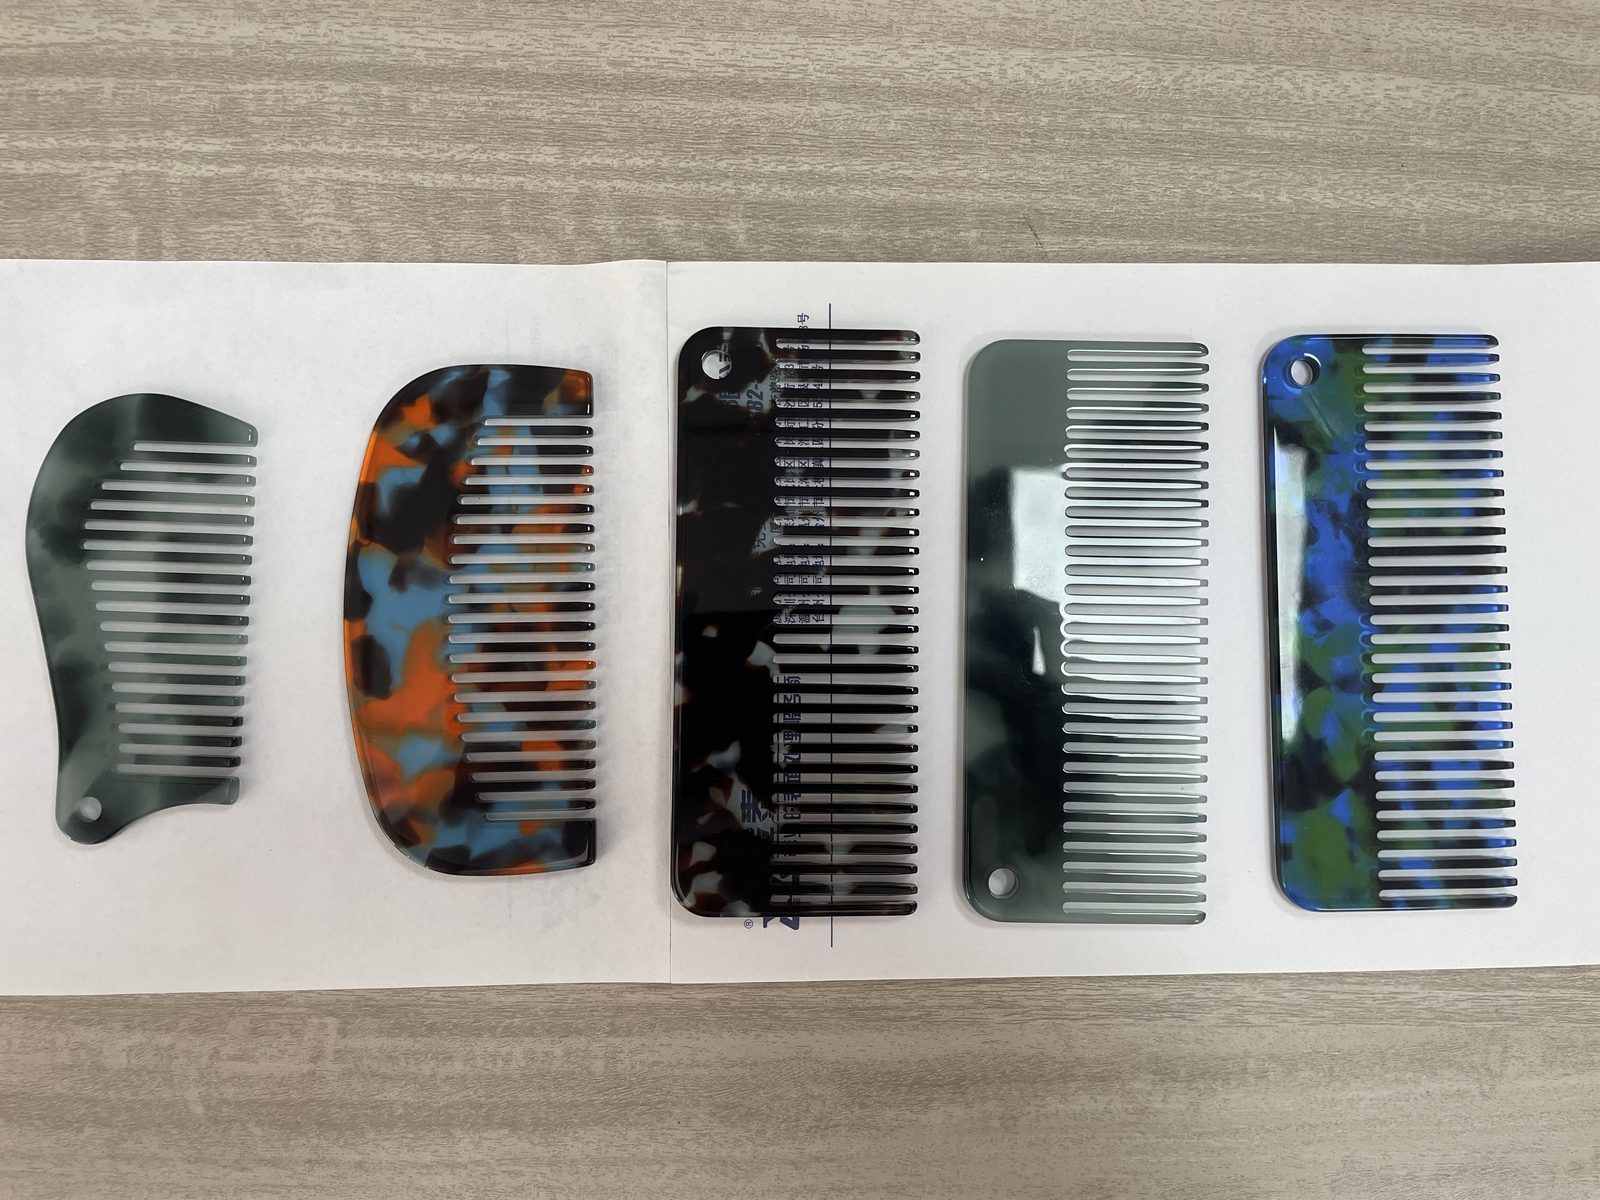
Buyers often ask for mirror-clear edges alongside razor-sharp corners. In batch tumbling, media removes material slightly faster at exposed corners than on recessed flats, which gently breaks sharp edges while smoothing saw or router marks. If your drawing requires dead-sharp optical corners alongside a clear face, you must plan your machining allowance and tumbling sequence together.
Four Industrial Routes to Polish Acrylic
When shops look for ways to polish acrylic at scale, four distinct methods show up on the market. Only some of them belong in a repeatable batch production line, and understanding the boundary between them saves wasted capital.
| Polishing Route | Best Part Geometry | Optical Clarity Potential | Edge Preservation | Batch Consistency |
|---|---|---|---|---|
| Wet Plastic & Media Tumbling | Small-to-medium machined or moulded batches | Satin to smooth pre-polish base | Gentle, uniform edge radiusing | High across every piece in the load |
| Dry Organic Media Tumbling | Eyewear frames, buttons, blocks, small housings | High clarity and surface gloss | Smooth, rounded touch-friendly edges | High when compound and media stay dry |
| Wheel Buffing & Compound | Large flat sheets, long display rails, single prototypes | High localized mirror clarity | Depends heavily on operator skill | Variable from piece to piece |
| Flame or Vapour Polishing | Thick cast blocks, internal bore channels | Very high instant gloss | Risk of heat distortion or crazing | Sensitive to part stress and dwell time |
[DESIGN: Side-by-side workflow diagram contrasting batch wet/dry tumbling inside a rotating barrel against single-piece manual wheel buffing]
Wet mass finishing with plastic wet polishing machines
For machined acrylic components carrying milling marks, saw lines, or laser-cut striations, wet mass finishing inside a plastic wet polishing machine or vibratory bowl provides the safest first cut. Water carries away heat, flushes fine swarf out of the media bed, and keeps the abrasive open. Wet tumbling removes tooling marks uniformly without softening the polymer.
Dry barrel tumbling for final acrylic gloss
Once tooling marks are smoothed out, dry barrel tumbling takes acrylic from a uniform matte stage to a bright, clear finish. Parts run inside a barrel tumbler loaded with treated organic media such as wood pegs, walnut shell, or corn cob dressed with paste. Dry tumbling delivers a consistent acrylic polish across hundreds of small parts at once.

Cloth wheel buffing for oversized sheets and rails
Large display panels and long extruded strips cannot fit inside a tumbling barrel without colliding. Those parts go to a stationary spindle with soft cloth wheels. We do not build cloth buffing wheels, handheld buffers, or solid wax bars for cloth wheels, because our equipment focuses on automated chamber-based batch finishing.
Flame and chemical vapour routes
Torches and solvent vapour chambers are common in sign shops and small fabrication houses. Both melt or dissolve a microscopic skin of acrylic so it flows smooth on a test piece. We do not build flame torches or chemical vapour tanks, and thermal or chemical flow often triggers stress crazing on laser-cut parts.
Choosing an Industrial Acrylic Polisher
Selecting an acrylic polisher comes down to batch size, part dimensions, and how deep the incoming tooling marks are. A machine that shines moulded eyewear frames may stall on heavy CNC-milled manifold blocks.

Plastic wet polishing machines for cut-down stages
A plastic wet polishing machine uses controlled water flow, gentle tumbling motion, and fine-cut media to erase router ridges and saw marks before any brightening step begins. Water keeps the load cool and suspends fine plastic dust so it cannot embed back into the soft surface. Starting with a wet cut-down stage cuts total dry-polishing time dramatically and prevents hazy patches.
Double-barrel and double-deck dry polishing tumblers
For eyewear frames, cosmetic caps, instrument lenses, and small acrylic blocks, double-barrel and double-deck dry polishing tumblers remain the workhorse acrylic polisher on the factory floor. Rotating barrels lift and cascade parts gently through dry organic media without violent impacts. Multi-barrel layouts let a shop run coarse smoothing, intermediate brightening, and final glossing simultaneously in separate drums.
Vibratory finishing machines for larger or heavier acrylic parts
When acrylic components are too large for standard barrel chambers or need continuous separation, a vibratory finishing machine with polyurethane lining offers an open-top alternative. The lining cushions impacts while the gentle rolling action keeps parts separated inside the media bed. See our full vibratory finishing guide for how bowl and tub motion differs from barrel rotation.
Centrifugal barrel machines for compact precision batches
Tiny precision acrylic parts—such as watch crystals, miniature optical diffusers, and small medical housings—sometimes lack the weight to sink properly into a slow rotary barrel. A centrifugal barrel system from our barrel finishing machines line multiplies effective gravity inside sealed drums so lightweight plastic parts stay submerged in the media bed. Higher force requires carefully matched soft media so lightweight parts do not chip against the drum wall.
Tumbling Media and Compounds for Acrylic Polishing
An acrylic polisher is only as effective as the media and compound loaded inside it. Using the wrong abrasive turns clear PMMA into frosted glass in minutes.

Pre-polish plastic and fine ceramic media
When incoming parts have visible milling steps or deep laser-cut ridges, organic media alone will never level the surface—it will simply polish the bottoms of the scratches. You need a pre-cut stage using resin-bonded plastic media or gentle ceramic shapes from our grinding media range. Resin-bonded plastic media matches the softness of acrylic more closely, cutting tooling lines cleanly without bruising flat faces.
Hardwood, bamboo, and walnut shell for intermediate smoothing
After wet cut-down, parts move into dry intermediate media—typically small hardwood pegs, bamboo pins, or graded walnut shell from our dry finishing media line. Dressed with a measured dose of polishing cream or paste, these natural carriers gently shear off the fine haze left by wet cutting. Consistent media conditioning matters here: under-dressed media drags and scratches, while over-dressed media cakes onto part corners.
Corn cob granules for final dry brightening
Corn cob is softer and lighter than walnut shell, making it the standard carrier for the final brightening pass in dry acrylic polishing. It absorbs residual oil or paste while buffing the polymer surface to a crisp, distortion-free sheen. Keeping a dedicated final-stage barrel exclusively for clean corn cob avoids cross-contaminating finished parts with coarse cut-down grit.
Compounds and pastes without harsh solvents
Wet acrylic tumbling relies on neutral, low-foam liquid compounds formulated to lubricate plastic and keep acrylic fines in suspension. Dry acrylic tumbling uses specialized polishing pastes designed to coat wood, walnut, or corn cob media evenly without leaving greasy streaks. We supply liquid compounds for wet media systems and select pastes for dry tumbling routes, while never offering solid wax bars meant for cloth buffing wheels.
Step-by-Step Batch Workflow to Polish Acrylic
A repeatable acrylic polish follows a strict stage sequence. Skipping the prep stage or mixing wet and dry media in the same barrel always costs more time in rework than it saves.
| Stage | Objective | Typical Media & Action | Key Operator Check |
|---|---|---|---|
| 1. Incoming Inspection | Verify cut quality and stress state | Check for deep saw gouges, cracks, or burnt laser edges | Reject or pre-sand deep gouges before loading |
| 2. Wet Cut-Down | Erase milling, router, and saw marks | Fine plastic media with water and neutral compound | Confirm uniform matte surface with zero shiny low spots |
| 3. Rinse & Dry | Remove all wet grit and moisture | Clean water rinse followed by thorough air or spin drying | Zero residual grit or water spots before dry barrels |
| 4. Dry Intermediate | Clear wet matte haze | Conditioned walnut shell or wood pegs with polishing paste | Monitor barrel temperature so load stays cool |
| 5. Final Brightening | Reach optical clarity and clean feel | Clean corn cob media with light finishing cream | Inspect under angled light for swirl or paste residue |
[DESIGN: Five-stage progression board showing an acrylic eyewear temple moving from raw CNC cut through wet matte, intermediate dry smooth, and final optical clear finish]
Inspecting incoming cut marks and annealing stress
Before loading any acrylic polisher, examine the incoming edges under raking light. Deep bandsaw chatter or melted laser beads cannot be tumbled out quickly without over-rounding the part's overall geometry. If laser-cut acrylic parts will see heavy compounding, stress-relieving or annealing beforehand prevents edge crazing later in the cycle.
Running the wet cut-down until the surface is uniform
Load the wet barrel or vibratory bowl with enough media so parts never collide directly with one another. Run the wet cut-down until every face shows an even, velvety matte texture—just like removing grinding and sanding marks on metal before brightening. Never move an acrylic batch to dry polishing while isolated shiny low spots or deep router lines remain visible.
Washing and drying completely between wet and dry stages
Carrying wet abrasive grit or moisture into a dry organic barrel ruins the entire charge of walnut shell or corn cob by clumping the granules into sticky balls. Wash parts thoroughly with clean water, then dry them completely before transferring to the dry tumbler. See our guide on post-finishing separate wash and dry for why separating wet cleaning from dry media keeps consumables clean.
Conditioning dry media before adding parts
Never dump raw polishing paste directly onto dry acrylic parts inside a barrel; the paste will smear into thick clumps inside holes and corners. Instead, run the paste with dry walnut shell or corn cob alone first until every granule is evenly coated. Properly conditioned dry media polishes corners and recesses evenly without leaving wax buildup.
Cast vs Extruded vs 3D-Printed Acrylic
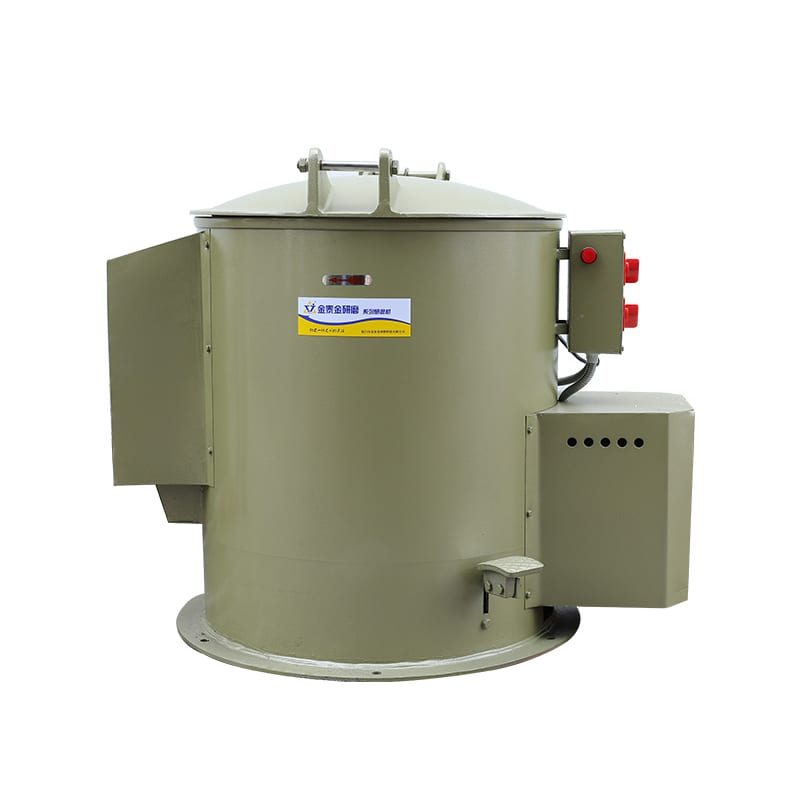
Not all acrylic responds identically inside an acrylic polisher. Treating cast PMMA, extruded sheet, and clear resin prints as the same material leads to melted edges and cloudy rejects.
Cast acrylic handles higher friction cleanly
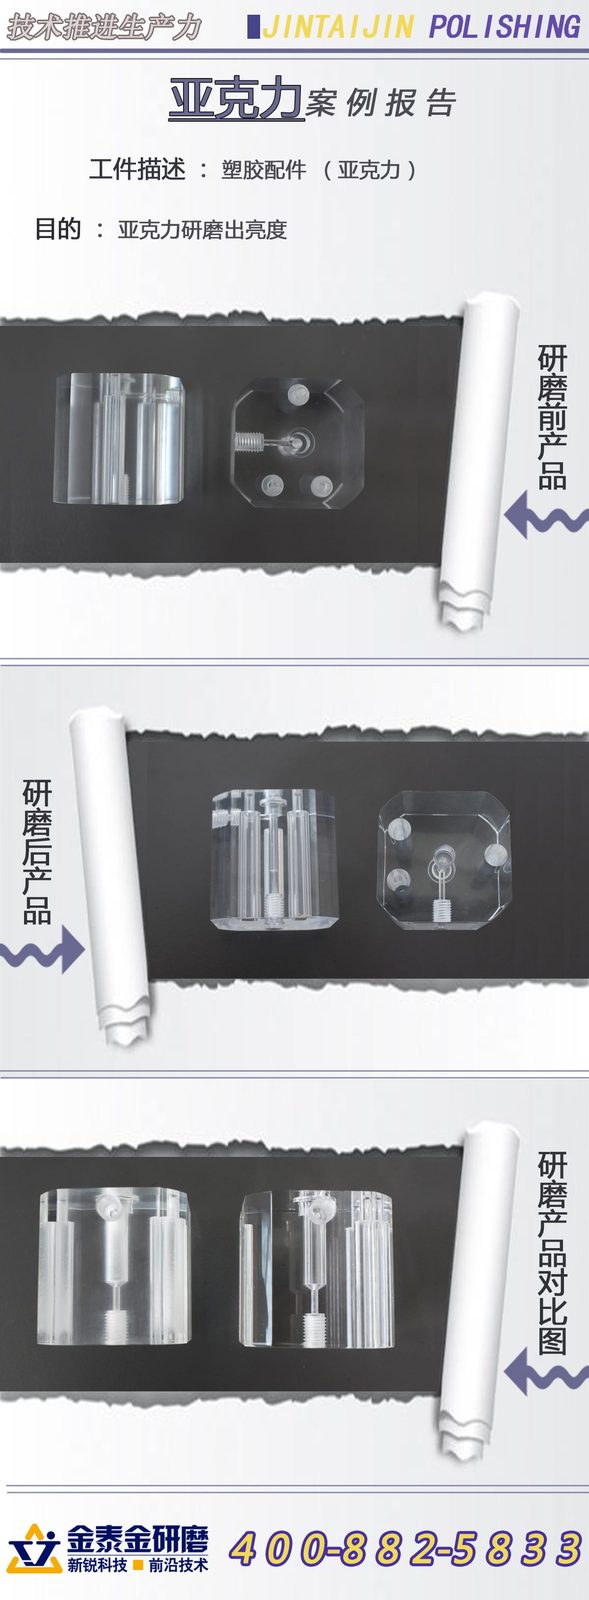
Cell-cast acrylic has higher molecular weight, making it harder, more heat-resistant, and less prone to smearing. It tolerates brisker wet cut-down and polishes to a crisp optical finish in dry barrels. Cast acrylic is the easiest grade to polish consistently in batch mass-finishing equipment.
Extruded acrylic smears faster under heat
Extruded acrylic softens at a lower temperature and carries directional extrusion stress. Aggressive dry tumbling or tight barrel loads can cause extruded strips to gum up media or develop ripples. Keep extruded batches well-lubricated during wet cut-down and monitor barrel warmth closely during dry brightening.
Laser-cut edges carry hidden thermal stress
Laser cutting leaves a glossy edge right off the machine, misleading buyers into skipping finishing. In reality, that edge holds high thermal stress and micro-waviness from the beam pulse. Laser-cut acrylic requires gentle wet smoothing before dry polishing, and must avoid alcohol or harsh solvents completely.
Clear 3D-printed acrylic resins require gentle support
Photopolymer resins marketed as "clear acrylic-like" are brittle compared with cast PMMA and carry tiny layer lines. Heavy media chips thin walls or rounds delicate snap-fits before layer lines disappear. Use small, lightweight plastic media for layer smoothing and test a sample batch first to confirm wall survival.
Common Acrylic Polishing Defects and Shop Fixes
When an acrylic polish batch comes out hazy, scratched, or sticky, the cause usually traces back to media cleanliness, load ratio, or skipped rinsing rather than a faulty machine.
| Defect Observed | Most Likely Root Cause | Immediate Shop Check | Corrective Action |
|---|---|---|---|
| Milky white haze across flats | Wet cut-down grit carried into dry media, or dried-out dry media | Inspect dry media for clumps or greyish dust | Screen or replace fouled dry media; verify clean rinse and dry |
| Part-on-part dings and nicks | Media-to-part ratio too low; parts colliding in the chamber | Watch load tumble at top of cycle for part-to-part contact | Increase media volume relative to parts or use divider compartments |
| Spiderweb cracks along cut edges | Residual laser/machining stress meeting incompatible compound | Check whether parts were wiped with alcohol or solvent | Switch to neutral water-based compound; anneal parts before finishing |
| Greasy paste packed in small holes | Paste added directly onto parts or excessive paste dose | Check media clumping and inspect blind slots under magnification | Pre-mix paste into dry media alone; reduce dose and clean media |
| Rounded corners on precision flats | Overly long wet cut-down trying to erase deep saw marks | Measure incoming cut depth before loading | Improve upstream CNC/saw finish so wet tumbling stays brief |
[DESIGN: Close-up troubleshooting board showing four acrylic defect samples: part-on-part collision ding, solvent crazing, paste buildup in blind hole, and cloudy over-heated face]
Fixing milky haze after dry tumbling
A milky film usually means either the wet cut-down left coarse scratches that dry corn cob cannot erase, or the dry media itself has become saturated with old acrylic dust. Fresh dry media never feels chalky or grey. If brightening slows down and parts turn cloudy, screen out fine dust or refresh the dry media charge immediately.
Stopping part-on-part collision marks
Even a single collision between two sharp acrylic corners inside a rotating drum leaves a permanent white crescent bruise inside the clear material. Never overload a barrel with parts to chase higher shift output. Maintain a generous cushion of media around every workpiece, or use compartmented barrels for heavy acrylic blocks.
Clearing media lodged in slots and mounting holes
Small walnut granules or plastic cones love to wedge inside narrow screw slots and blind counterbores. Once jammed, they block compound flow and scratch adjacent parts when they shake loose mid-cycle. Check part slot widths against media dimensions before ordering, and never expect a separator screen to pull wedged media out of a blind hole.
Removing stubborn paste from recesses
If dry polishing cream packs inside engraved logos or tight corners, dry wiping only smears it deeper. Wash finished parts briefly in warm, mild detergent water compatible with PMMA, rinse with clean water, and dry with filtered air or a centrifugal spin dryer lined for delicate parts. Never reach for acetone, lacquer thinner, or isopropyl alcohol to clean paste off acrylic.
How Xiamen Jin Tai Jin Builds and Supports Acrylic Finishing Lines
At Xiamen Jin Tai Jin Grinding Technology Co.,Ltd. (brand: Jings Polish), we have worked in surface finishing since our workshop started in 1992 and our company was formally established in 2002, delivering over 200,000+ sets of grinding and polishing solutions to customers worldwide. Across our machines portfolio, we manufacture 21 machine platforms backed by 24 granted Chinese IP rights—including 1 invention patent, 17 utility model patents, and 6 design patents—under ISO 9001 certification 00726Q01571R001 (valid 2026-06-03 to 2029-06-02) and CE certifications M.2023.206.C88121 (Vertical, 8 models) and M.2023.206.C88120 (Horizontal, 13 models), valid until 2028-07-24.

What we manufacture for plastic and eyewear acrylic lines
We build plastic wet polishing machines, double-barrel and double-deck dry polishing tumblers, vibratory bowls and tubs, centrifugal barrel and disc machines, heat centrifugal spin dryers, and media cleaning equipment. In our eyewear and plastic finishing lines, we supply dedicated equipment and media workflows for acetate, plastic, and acrylic components. You can browse our equipment families in our online catalogue.
What we do not build or promise
We believe in stating our boundaries plainly before you request a quote—just as we outline in choosing a mass finishing supplier. We do not run a contract job shop or accept parts for paid polishing, we do not sell cloth buffing wheels, handheld polishers, or solid wax bars for wheels, we do not supply blasting abrasives, flame torches, vapour tanks, or coating/clear-coat services, and we do not design chemical cleaning formulas.
Honest lead times and how we assess your parts
Standard machines carry a 25 to 35 day build lead time, while custom-configured lines and specialized barrel layouts require 45 to 60 days. Because every acrylic grade, wall thickness, and incoming cut mark behaves differently, we do not promise free sample trials by mail or guarantee cycle times without checking your actual workpiece—send clear photos of your acrylic parts and target finish via our custom polishing solution page for an initial engineering assessment.
Comparing acrylic finishing alongside metal job-shop workflows
Many fabrication shops finish both plastic housings and metal brackets under one roof. While the machine concepts overlap, never share media charges or barrels between acrylic and steel or aluminium—embedded metal fines instantly ruin clear PMMA. See our job shop finishing and aluminum finishes guides for keeping multi-material cells strictly separated.
Frequently Asked Questions
Can a tumbling machine give a true optical acrylic polish?
Yes, when the process follows the right sequence. Wet cut-down removes milling or saw marks evenly, and staged dry barrel tumbling with walnut shell and corn cob brings machined or moulded acrylic to a clear, uniform gloss.
What kind of acrylic polisher is best for small batch parts?
For machined blocks, eyewear frames, and housings, a plastic wet polishing machine paired with a double-barrel dry polishing tumbler is the standard industrial setup. It separates wet cutting from dry brightening so batches stay cool.
Why did my acrylic parts turn cloudy in the tumbler?
Cloudiness comes from friction heat during dry running, leftover grit carried from wet cutting, or spent dry media loaded with dust. Checking part-to-media ratio, rinsing between stages, and refreshing dry media clears the haze.
How do I polish acrylic without causing cracks along laser-cut edges?
Avoid alcohol, acetone, and solvent cleaners, which trigger stress crazing on laser-cut PMMA. Use neutral water-based compounds during wet smoothing, and anneal high-stress laser-cut parts before compounding.
Can you polish acrylic and metal parts in the same media?
No. Metal dust and hard ceramic grit embed into soft acrylic and scratch it permanently. Keep barrels, media charges, and rinse baskets strictly separated for plastic and acrylic work.
What information should I send before asking for an acrylic polisher quote?
Send clear photos of your acrylic parts showing current cut or mould marks, overall part dimensions, whether the material is cast or extruded, and your daily batch volume. Our engineers can provide an initial process assessment from photos and drawings before configuring a machine.
[DESIGN: Annotated buyer enquiry checklist showing photo angles, edge close-ups, and batch sizing notes for acrylic parts]
 +86-592-2381506


 IPv6 network supported