Repolish Stainless Steel in Production: When Mass Finishing Can Restore and Revive Batches
When stainless steel hardware leaves storage dull, picks up handling scratches on an assembly line, or shows weld discoloration after fabrication, buyers search for ways to repolish stainless steel, reshine flatware, or restore corroded fittings back to print. Most online advice assumes you are wiping a kitchen sink with household paste. On a factory floor, trying to revive hundreds of scuffed hinges, valve sleeves, or stamped brackets by hand destroys shift margins.
This guide explains when batch mass finishing can repolish stainless steel parts cleanly, how to separate removable hardware from fixed architectural panels, and which machines, media, and compounds restore uniform lustre. For base stainless process rules, see stainless steel finishes and removing scratches from stainless steel.
Why Stainless Steel Loses Its Finish in the First Place
Before choosing a machine to restore a batch, identify what actually dulled the metal. Oxidized scale, embedded iron dust, and mechanical handling gouges require completely different stages inside the chamber.
Handling scratches and bin-to-bin scuffing
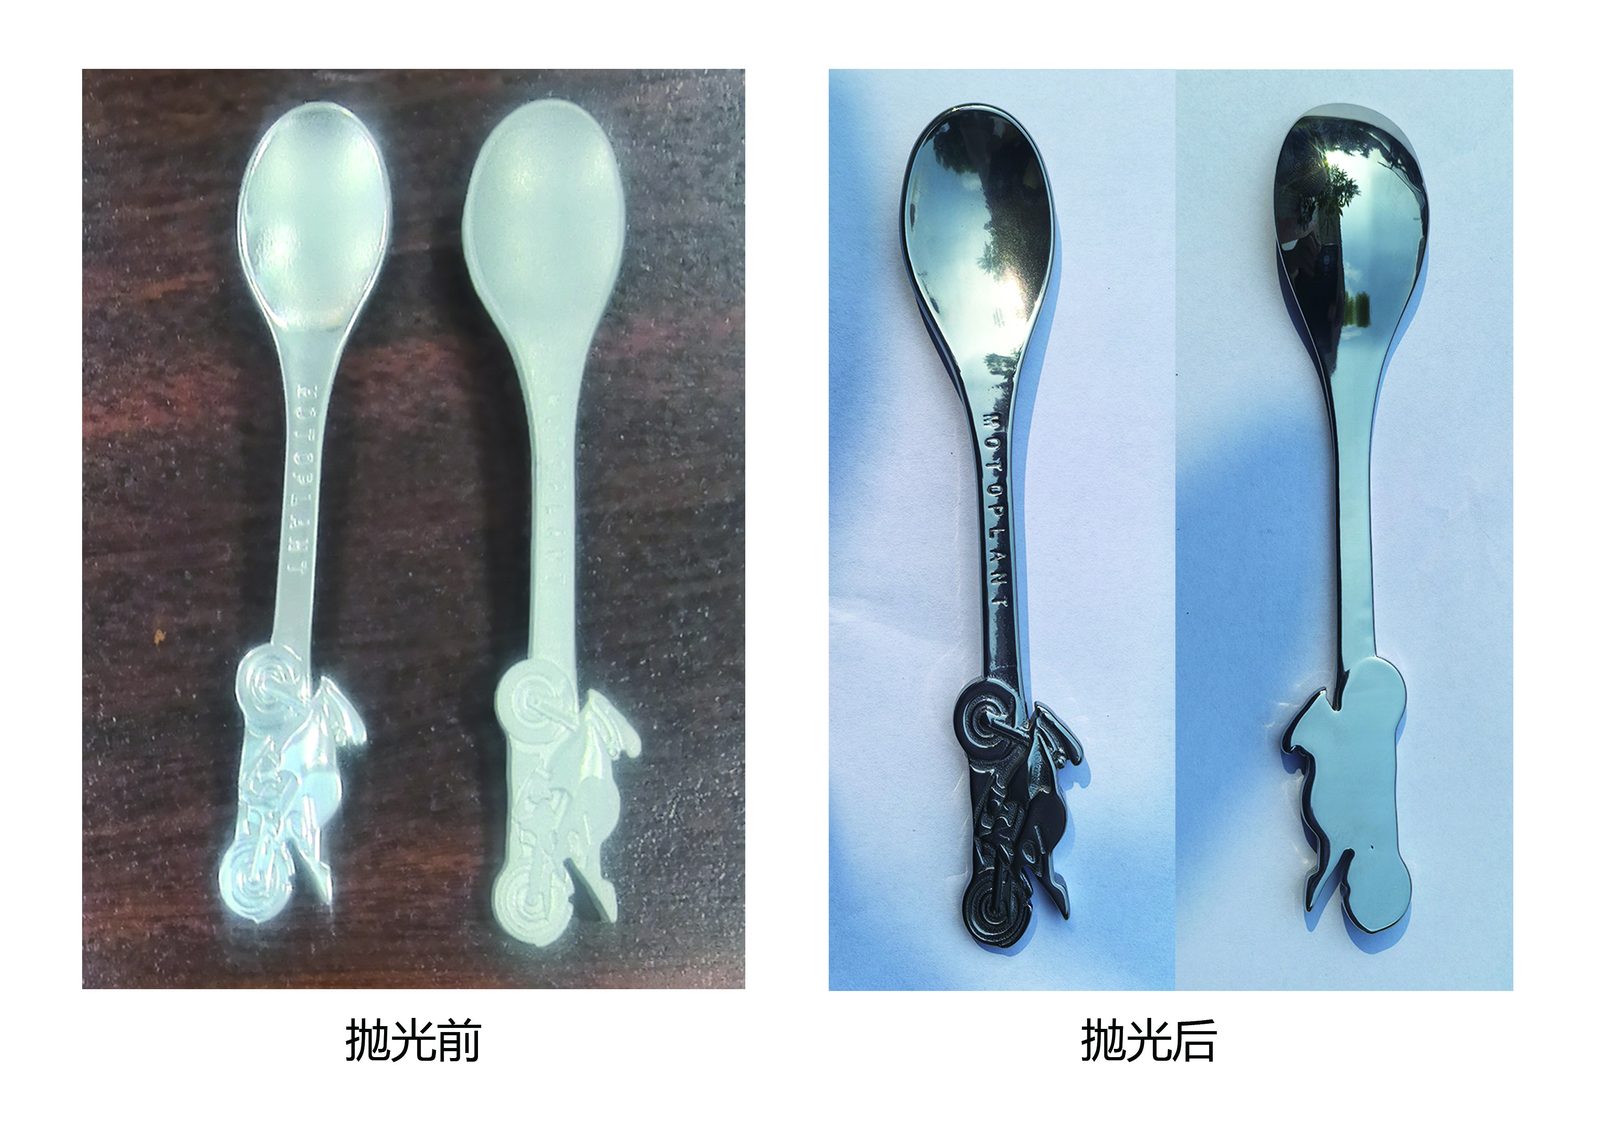
Loose stainless brackets, spoons, and turned bushings dumped into metal tote bins rub against each other during transport. Those micro-scratches scatter light, making a once-bright lot look cloudy and worn. Shallow handling scuffs respond well to a brief plastic-media cut-down followed by high-alumina or steel burnishing to reshine the entire batch.
Surface rust, tea staining, and embedded iron
Stainless steel resists corrosion only when its chromium-rich surface stays clean and free of foreign iron. Parts machined with worn carbon-steel tooling or stored near grinding sparks pick up stray iron particles that bloom into orange tea-staining. Before any brightening media touches the part, compound-MC8 rust removal strips surface iron oxide so corrosion does not return.
Thermal heat tint from welding or dry buffing
Spot welding, laser tacking, and overly aggressive dry wheel buffing leave yellow, blue, or straw-coloured oxide bands across stainless surfaces. Heat tint is a thin chemical oxide layer rather than a scratch, so brightening paste alone skates right over it. Removing heat tint mechanically requires cutting media (compound-LC10 or compound-JTJ20) rather than a light burnish.
Dried compound film and hard-water mineral spotting
Many "dull" stainless batches are not scratched at all—they are coated in dried soap residue or hard-water calcium spots from poor rinsing. Running a clean wash and centrifugal spin-dry cycle can revive the original sheen without cutting any metal. See our post-finishing separate wash and dry guide for proper rinse separation.
Batch Mass Finishing vs Single-Piece Refurbishment
Not every job asking to repolish stainless steel belongs inside a vibratory bowl or rotary barrel. Separate removable production batches from fixed field installations first.
| Repolishing Scenario | Best Workshop Approach | Can Batch Chambers Handle It? | Key Decision Rule |
|---|---|---|---|
| Scuffed hinges, fasteners, valves & flatware | Vibratory bowl, rotary barrel, or magnetic polisher | Yes — ideal for batch restoration | Separate parts by alloy and incoming scratch depth |
| Deep CNC gouges or heavy weld beads | Upstream belt/disc repair followed by mass finishing | Partial — chamber smooths after heavy marks are levelled | Mass finishing cannot erase deep gouges without rounding corners |
| Installed handrails, sinks, or kitchen panels | On-site handheld pads or stationary buffing wheels | No — cannot fit inside a closed tumbling chamber | Keep fixed architectural panels on manual/portable tools |
| Parts needing plating, passivation, or clear coat | Dedicated chemical or plating vendor after polishing | No — we do not supply plating, passivation, or lacquers | Mass finishing delivers bare mechanical metal finish only |
[DESIGN: Decision flowchart separating removable batch stainless hardware suitable for vibratory/barrel chambers from fixed architectural panels requiring on-site work]
Removable hardware batches that chambers restore cleanly
Small and medium stainless components—such as hinges, valve bodies, cutlery, helical springs, electrical contacts, and stamped brackets—fit easily inside vibratory bowls, rotary barrels, or centrifugal units. Because media surrounds every face simultaneously, batch chambers restore uniform matte, satin, or bright-burnished finishes across hundreds of pieces per load. Batch processing turns multi-hour hand rework into a single timed cycle.
Deep gouges that need upstream mechanical levelling
If a stainless part dropped onto concrete or suffered a deep lathe chatter mark, tumbling it directly in fine brightening media will only polish the bottom of the gouge. Level deep localized gouges first using upstream grinding, just as detailed in grinding and sanding marks. Mass finishing refines uniform surfaces; it is not a substitute for removing deep mechanical damage.
Why fixed architectural stainless cannot use tumbling chambers
Contractors often search repolish stainless steel looking for handheld pads to revive installed elevator doors, restaurant counters, or marine railings. Tumbling equipment requires loose parts inside a moving chamber, so fixed structures stay outside our scope. We do not build handheld grinders, belt sanders, cloth buffing wheels, or on-site refurbishment kits.
Honest scope: no contract job-shop or coating services
Some buyers want to ship dull stainless inventory to an equipment maker for one-time paid restoration, or ask for a clear lacquer coat afterward to lock in the shine. We do not operate a contract job shop, and we do not promise clear-coat sealing, lacquer application, passivation, or refurbishment services—we build the machines that factories and job shops run in-house.
Choosing the Right Machine to Repolish Stainless Steel
Selecting the right chamber from our machines portfolio depends on whether your parts need aggressive oxide stripping, gentle cosmetic brightening, or internal bore cleaning.

Vibratory bowls for general scratch removal and reshine
A vibratory finishing machine (ZL series) is the most versatile workhorse to repolish stainless steel batches. Open-top bowls let operators inspect surface recovery mid-cycle without stopping the whole line, while built-in separation screens unload restored hardware cleanly. See our vibratory finishing guide for how bowl motion blends light scratches evenly.
Rotary barrels for quiet, tight-tolerance restoration
When thin stamped plates or precision fittings already meet tight dimensional tolerances and only need a gentle reshine, a slow drum from our barrel finishing machines line avoids harsh vibration. Cascading media glides smoothly over surfaces, restoring lustre while keeping edge radii tight. Double-barrel layouts also let a shop run wet smoothing in one drum and dry brightening in the next.
Centrifugal units for small tarnished hardware
Tiny stainless components—like watch links, chain connectors, buckles, and miniature fasteners—often lack enough individual weight to cut quickly in a standard bowl. Centrifugal disc units (LLF120) and centrifugal barrel machines multiply effective media pressure, stripping tarnish and restoring brightness rapidly. Short, controlled centrifugal runs revive small hardware batches without tangling.
Magnetic polishers for tarnished threads and blind bores
When stainless valve sleeves, switch housings, or threaded fittings pick up scale or discoloration inside blind holes, ceramic chips cannot reach inside. A magnetic precision polisher (OBD-30 through OBD-100 or OBD-HBPG series) spins fine stainless pins inside internal bores and grooves. Magnetic pin action restores internal brightness while leaving outer thread crests sharp.

Media and Compounds That Restore and Revive Stainless
Picking the right consumable charge is what turns a dull, oxidized batch back into clean, shippable stainless steel. Match media hardness and liquid chemistry strictly to the incoming defect.

Cutting media for heavy oxidation and deep scuffs
If parts carry visible machining marks, heat tint, or deep handling scratches, start with preformed ceramic triangles or angle-cut cylinders from our grinding media line. Ceramic cutting chips shear away damaged surface skin so the whole part starts from an even, uniform matte base. Never try to brighten over deep scratches—cut the surface uniform first.
Plastic media for gentle pre-polish smoothing
When parts only suffer from light bin scuffing or minor surface haze, heavy ceramic chips remove more metal than necessary. Resin-bonded plastic cones smooth shallow marks gently while protecting sharp corners and delicate engravings. Plastic media is the safest bridge between raw damage and final stainless brightening.
High-alumina, steel, and dry cob media to reshine
Once the surface is uniform, switch to non-abrasive burnishing media—high-alumina ceramic balls or hardened steel media—to compress surface peaks into a bright lustre. For decorative stainless cutlery or hardware needing a warm dry sheen, follow with dry walnut shell or corn cob from our dry finishing media line. Burnishing media never cuts away burrs; it only brightens a properly prepared surface.
Verified Jings Polish compounds for stainless restoration
Running water alone stains stainless steel grey and lets iron fines settle back onto the metal. Match our verified chemical codes to each stage of restoration:
compound-MC8: Strips surface rust, tea-staining, and light oxide scale.compound-LC10: Supports aggressive deburring and heavy edge cleanup.compound-JTJ20: Delivers coarse cutting action on stainless steel surfaces.compound-JTJ50: Restores bright lustre during stainless steel brightening runs.compound-JTJ60&compound-JTS5: Fine polishing support for mixed hardware and thin-sheet stainless.compound-HM3: Final polishing support for clean, uniform sheen.

MC8, LC10, JTJ20, JTJ50) arranged beside a stainless restoration test batchStep-by-Step Workflow to Restore a Dull Stainless Batch
Following a disciplined sequence ensures you restore the batch on the first pass instead of chasing streaks across multiple re-runs.
| Stage | Target Defect | Media & Compound Choice | Inspection Gate Before Next Stage |
|---|---|---|---|
| 1. Degrease & Oxide Strip | Oil film, tea-staining, light rust | Ceramic or plastic media + compound-MC8 |
Zero orange rust or oily water-break on surface |
| 2. Uniform Cut-Down | Handling scuffs, heat tint, tool marks | Ceramic triangles or plastic cones + compound-JTJ20 |
Even matte finish with zero deep scratch shadows |
| 3. Bright Burnishing | Dull matte surface needing lustre | High-alumina ceramic or steel media + compound-JTJ50 |
Uniform brightness across flats and recesses |
| 4. Clean Rinse & Spin Dry | Residual compound and mineral water | Clean water rinse + heat centrifugal spin dryer (35/70 series) |
Completely dry, spot-free parts under angled light |
[DESIGN: Four-step progression board showing a scuffed stainless hinge moving from tarnished raw state through oxide strip, uniform matte cut, and bright spin-dried finish]
Inspecting incoming batches and sorting by damage depth
Mixing lightly scuffed parts with heavily corroded parts in the same chamber wastes media life and over-rounds the good parts while waiting for the worst ones to clear. Sort incoming lots by defect severity before loading. Consistent incoming condition produces consistent outgoing brightness.
Stripping oil, shop grime, and surface rust first
Shop oil, anti-rust grease, and cutting fluids coat tumbling media immediately, turning abrasive chips into slick, useless stones. Wash oily parts clean and run compound-MC8 if orange tea-staining is present. Clean metal and clean media are non-negotiable before any polishing stage begins.
Levelling scratches before switching to brightening media
Run the cut-down stage until every handling scratch and heat-tint shadow disappears into a single uniform matte finish. Switching to steel balls or compound-JTJ50 too early simply makes the scratches shinier and more obvious. Check buffing stainless steel for why brightness never hides poor preparation.
Rapid rinsing and spin drying to lock in the reshine
Pulling bright stainless steel out of a vibratory bowl and letting it drip-dry in air leaves cloudy mineral rings within minutes. Rinse batches promptly with clean water and dry them inside a heat centrifugal spin dryer (35, 35A, 70, or 70A models). Fast spin drying preserves the crisp reshine your machine just created.

Preventing Tarnish and Re-Scuffing After Restoration
Restoring a batch means little if the parts dull again before reaching the customer. Protect the newly finished surface right at the machine exit.

Eliminating iron cross-contamination in shared bowls
Never repolish stainless steel inside a vibratory bowl or media charge that recently ran carbon steel brackets. Microscopic carbon-steel dust embeds into stainless surfaces and triggers fresh rust spots days later. Dedicate separate media charges and thoroughly clean chambers for stainless work—a core rule in job shop finishing.
Stopping part-on-part collision during unloading
Freshly brightened stainless steel shows every tiny nick if parts drop from a high discharge chute onto hard steel baskets. Line catch trays with soft polyurethane or rubber, keep drop heights short, and avoid dumping heavy batches onto concrete-hard bins. Gentle handling at discharge protects hours of chamber polishing.
Keeping dry organic media clean and moisture-free
If your final revive step uses dry walnut shell or corn cob in a rotary barrel, never load damp parts straight from a wet rinse. Moisture clumps dry granules into sticky paste that spots bright steel. Confirm parts are bone-dry before entering any dry organic polishing drum.
Understanding why bare stainless needs clean storage
Because we do not offer clear-coat lacquers, plating, or chemical passivation, your restored stainless parts leave the machine as clean, bare mechanical metal. Store finished lots in dry, covered, compartmented trays away from carbon-steel grinding dust and acidic shop fumes. Clean dry storage keeps restored stainless bright until final assembly.
Common Mistakes When Trying to Revive Stainless Steel
Avoid these four shop-floor traps when setting up a line to repolish stainless steel inventory.
[DESIGN: Troubleshooting grid showing four failed stainless restoration samples: shiny deep scratches from skipped cut-down, mineral water spots, iron-contaminated rust blooms, and rounded corners from over-tumbling]
Using brightening compound to hide deep scratches
Buyers often ask for a magic liquid that will reshine deeply gouged metal in one quick pass. Brightening compounds like compound-JTJ50 and compound-HM3 only burnish the top microscopic layer—they cannot fill or erase deep grooves. Always cut out mechanical scratches first before attempting to brighten.
Running worn or undersized media that wedges in holes
Old ceramic charges full of broken fragments jam inside screw holes, slots, and valve ports during restoration cycles. Screen your media charge regularly and check worn chip size against your part's smallest opening. Replacing worn media on schedule prevents costly manual unblocking.
Over-tumbling precision parts to chase mirror gloss
Leaving precision machined stainless parts in aggressive ceramic media for too long rounds critical edges and shrinks outer dimensions while trying to erase one stubborn scratch. Inspect test batches regularly and set fixed cycle timers once the target finish is established. Protect dimensional tolerances first, then optimize brightness.
Expecting mass finishing to match hand-buffed flat sheets
On large, mirror-flat architectural plates, tumbling media produces a uniform, non-directional lustre rather than a distortion-free optical sheet reflection. Know your customer's drawing requirement before quoting—see finishing machine names and aluminum finishes for comparing non-directional versus directional finishes.
How Xiamen Jin Tai Jin Builds Stainless Restoration Equipment
At Xiamen Jin Tai Jin Grinding Technology Co.,Ltd. (brand: Jings Polish), our workshop started in 1992 and our company was formally established in 2002, delivering over 200,000+ sets of grinding and polishing solutions to customers worldwide. Across our catalogue, we manufacture 21 machine platforms backed by 24 granted Chinese IP rights—including 1 invention patent, 17 utility model patents, and 6 design patents—under ISO 9001 certification 00726Q01571R001 (valid 2026-06-03 to 2029-06-02) and CE certifications M.2023.206.C88121 (Vertical, 8 models) and M.2023.206.C88120 (Horizontal, 13 models), valid until 2028-07-24.

Equipment, media, and compounds we supply
We build vibratory bowls and troughs (ZL and L series), rotary barrels, centrifugal disc and barrel units (LLF120, LX series), drag finishers, magnetic precision polishers (OBD and HBPG series), heat centrifugal spin dryers (35, 35A, 70, 70A), and media cleaners. We also manufacture ceramic, plastic, high-alumina, steel, walnut shell, and corn cob media alongside our verified HM3, JTJ20, JTJ25, JTJ50, JTJ60, JTS5, LC10, and MC8 compounds.
Clear boundaries on what we do not offer
In accordance with our choosing a mass finishing supplier policy, we state our boundaries upfront. We do not run a contract job shop or accept parts for paid restoration; we do not offer clear-coat sealing, lacquer coating, plating, passivation, electropolishing, or on-site cleaning services; we do not sell handheld buffers, angle grinders, cloth buffing wheels, or solid wax bars for wheels; and we do not supply sandblasting abrasives or design custom chemical formulas.
Standard and custom equipment lead times
Standard stainless finishing and drying machines carry a 25 to 35 day production lead time. Custom-engineered troughs, compartmented drums, and integrated multi-stage lines require 45 to 60 days.
Requesting an initial assessment from part photos
We do not promise free mail-in sample trials or guarantee cycle times without checking your actual parts. Send clear photos showing your stainless steel scratches, oxidation, part geometry, and target finish via our custom polishing solution page—our engineers can assess your photos and drawings to recommend the right equipment and media workflow, or advise on mixed-metal shops alongside copper alloy finishing.
Frequently Asked Questions
Can a vibratory tumbler repolish stainless steel parts that are scratched?
Yes, for light-to-medium handling scuffs across removable hardware batches. Ceramic or resin-bonded plastic media levels the scratched surface into a uniform matte finish, and a second stage with high-alumina or steel media restores bright lustre. Deep mechanical gouges still need upstream grinding first.
How do I remove surface rust and tea-staining before brightening stainless?
Use a wet de-rusting cycle with compound-MC8 and clean ceramic or plastic media to strip orange iron oxide without pitting the metal. Rinse thoroughly afterward so loosened iron fines flush out before moving to brightening media.
Can you restore a mirror finish on large stainless sheets inside a tumbler?
No. Tumbling chambers are designed for loose batches of small-to-medium parts and produce a uniform, non-directional lustre. Large flat architectural sheets or fixed kitchen panels must be polished with dedicated sheet-buffing or handheld wheel equipment, which we do not manufacture.
Why did my stainless parts look dull right after unloading from the polisher?
Dullness after wet polishing is usually dried compound film or hard-water mineral spotting rather than incomplete polishing. Rinse parts immediately in clean water and dry them inside a heat centrifugal spin dryer (35 or 70 series) to keep the shine crisp.
Will mass finishing remove rainbow weld heat tint from stainless fittings?
Light weld discoloration can be cut away using dense ceramic media paired with compound-LC10 or compound-JTJ20, because those media cut a fresh surface layer. Heavy weld beads and thick scale should still be dressed mechanically upstream.
What photos should I send for a stainless steel restoration equipment quote?
Send clear, well-lit close-up photos showing the current scratches, heat tint, or oxidation, overall part dimensions, stainless grade, and daily batch quantity. Our engineers can provide an initial process and machine recommendation from photos and drawings.
[DESIGN: Annotated buyer enquiry guide showing close-up lighting angles for scratched and heat-tinted stainless steel parts]
 +86-592-2381506


 IPv6 network supported